
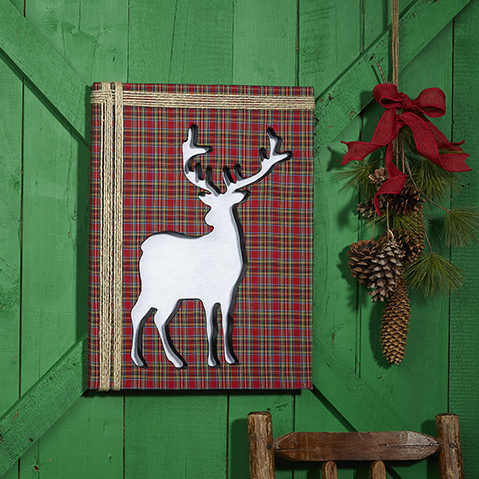
Supplies
- FloraCraft® CraftFōM®:
- (2) (2) 1”x 12”x 18” Sheets - White
- 28”x 22” - Plaid Fabric
- 24”x 18” Felt - White
- 7/8” Satin Ribbon - Black
- Heavy Jute Twine
Tools
- Foam Cutter
- Low-Temp Hot Glue Gun and Glue Sticks
- Scissors
- Fine Black Marker
- Straight Pins
- Permanent Adhesive Spray
- Plaid Deer Template:
Instructions
- Glue the two sheets together along the 18” sides.
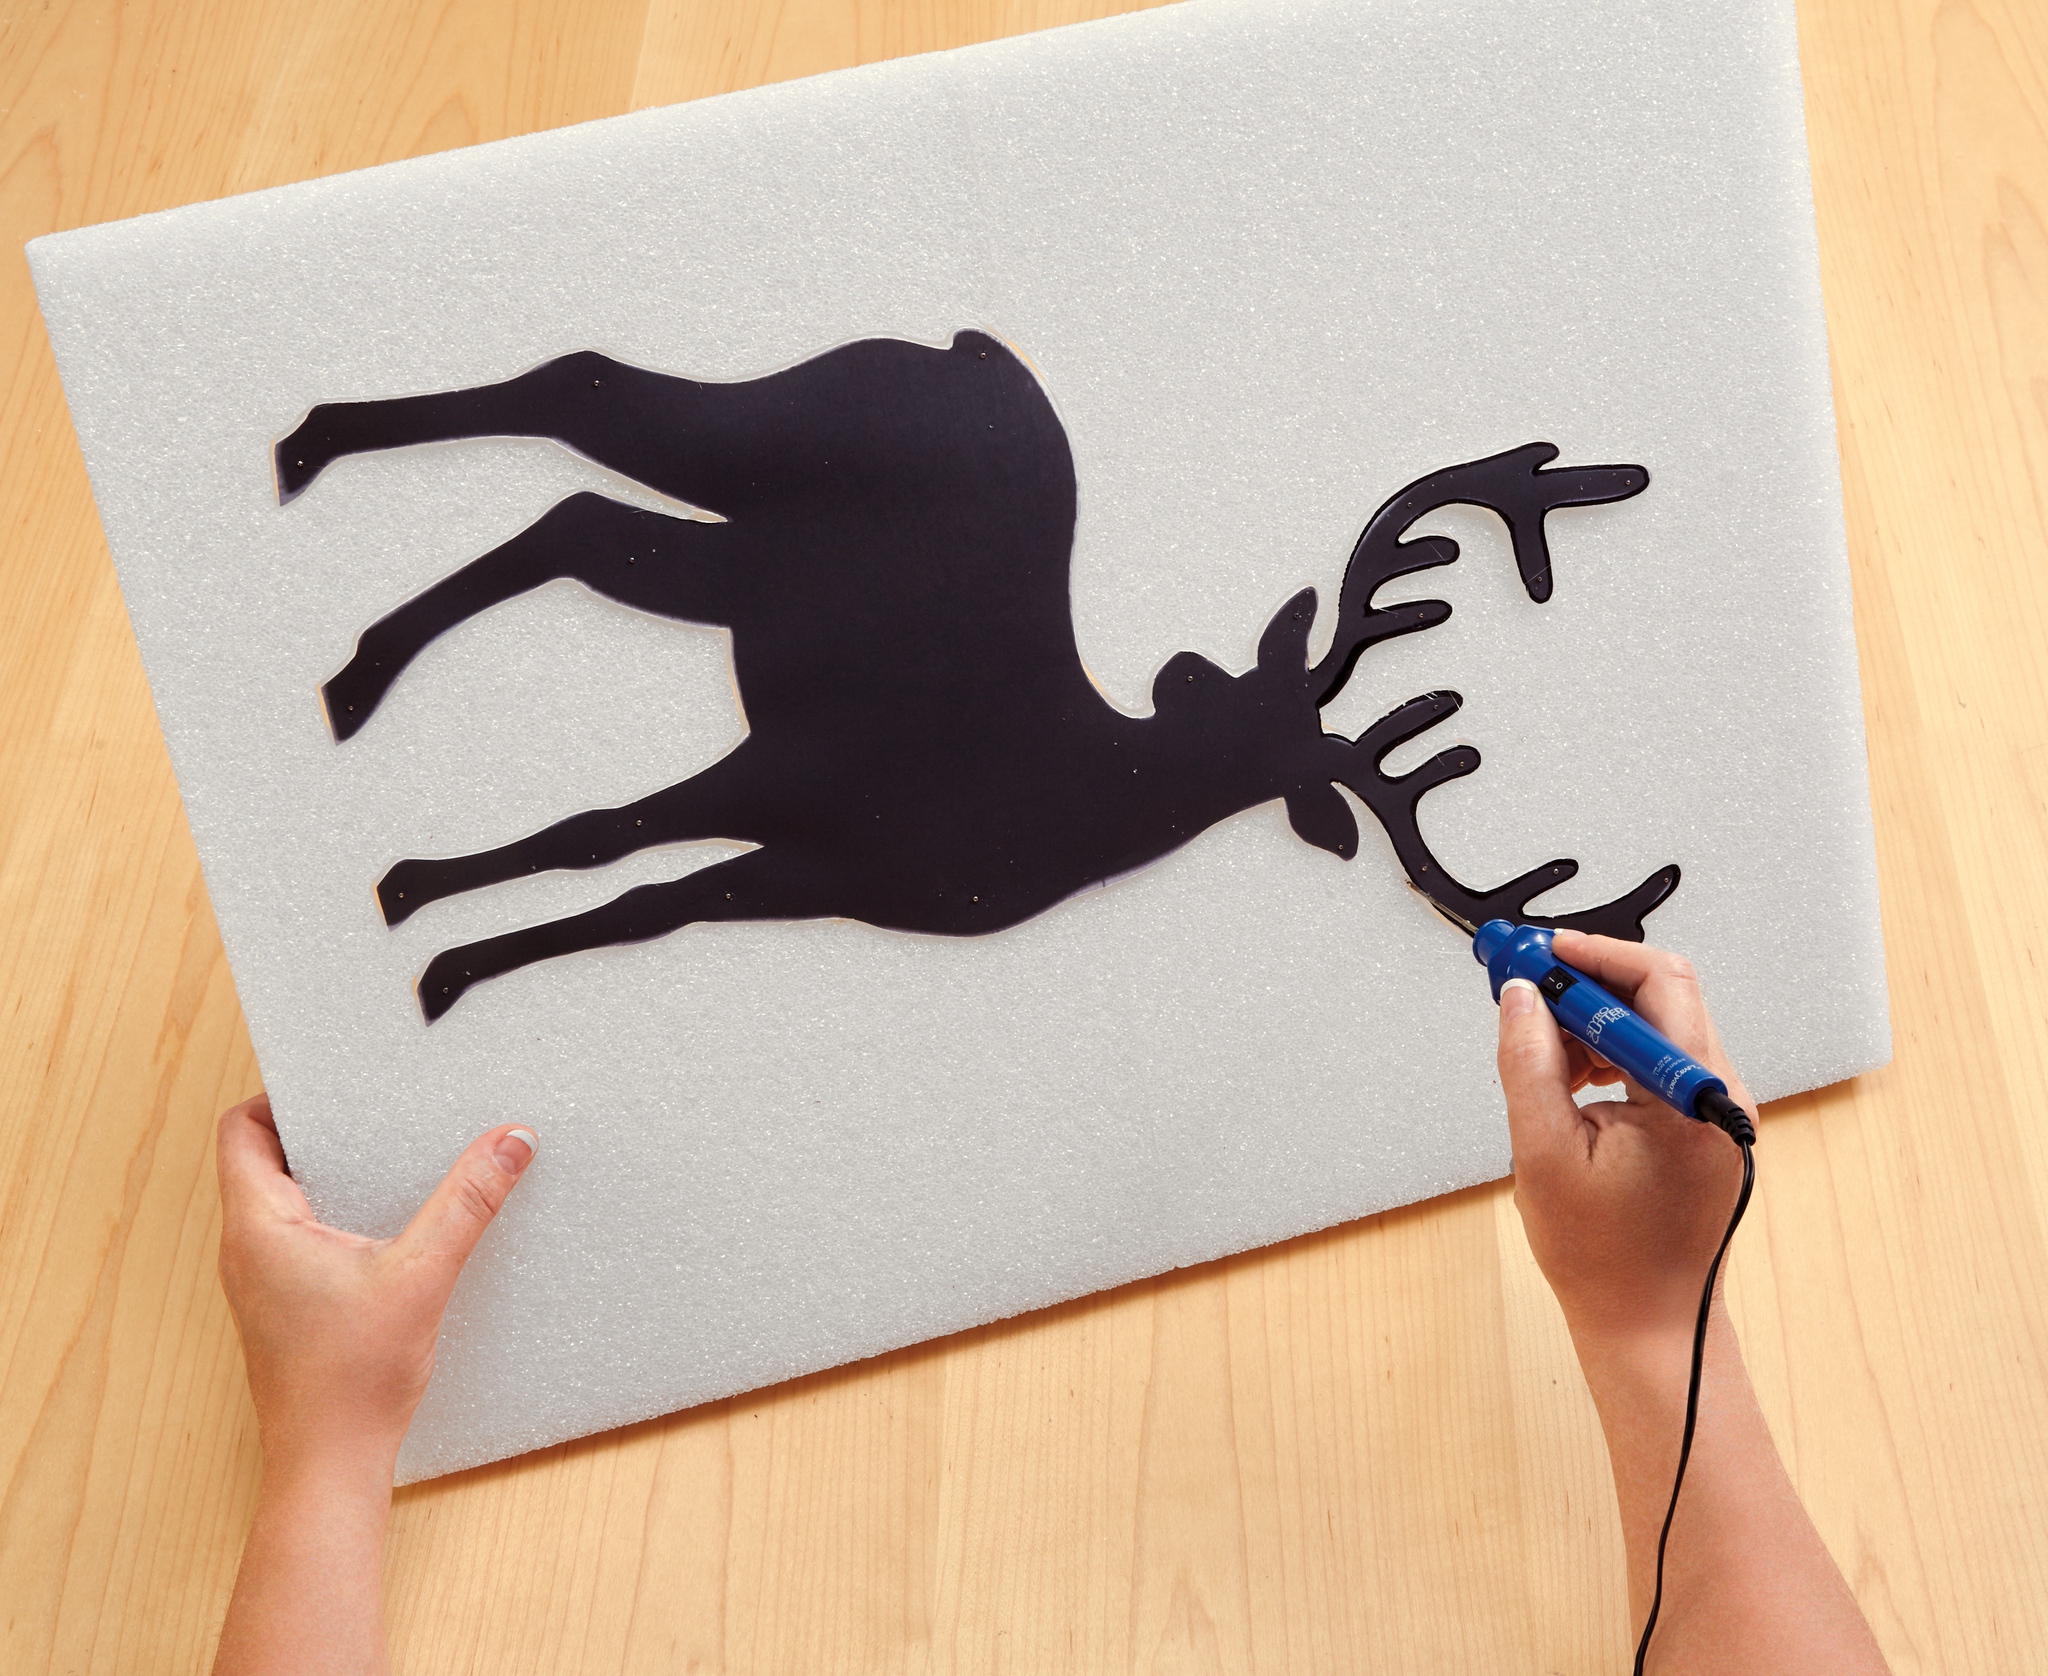
- Cut out the deer template. Pin it centered onto the foam about 2” from the bottom. Follow the package instructions on the foam cutter, use it to cut out the deer template from the foam.
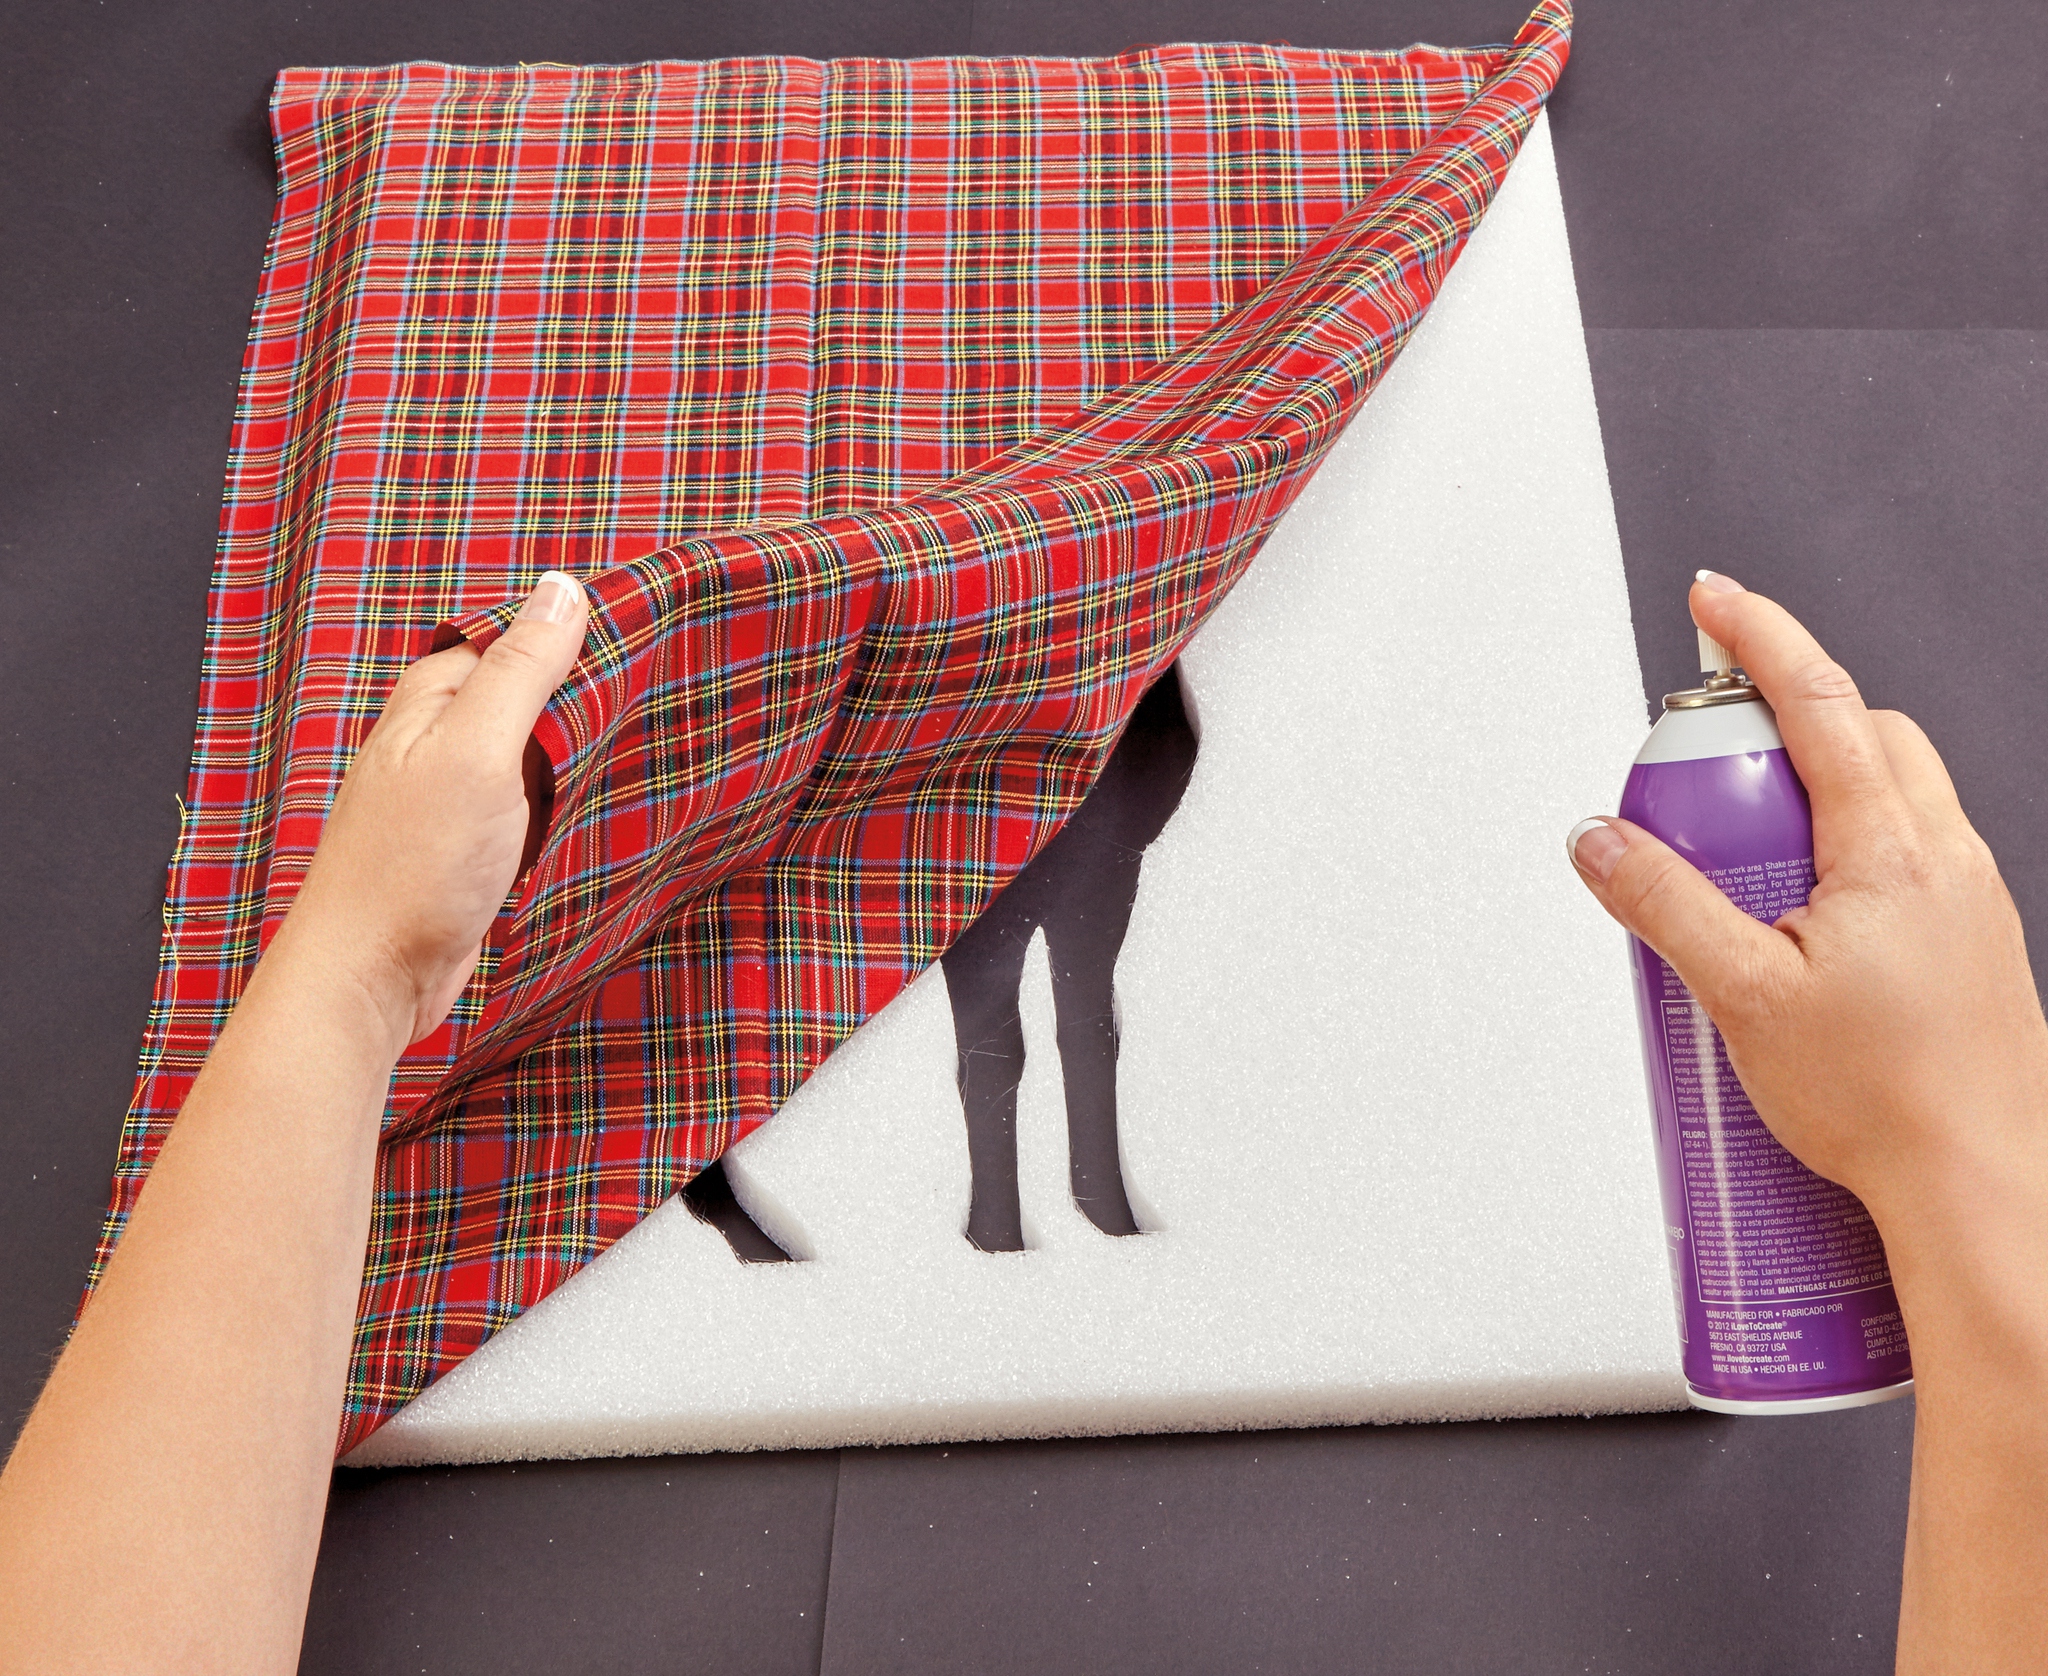
- Lay the piece of plaid fabric flat on the table, right side down. Lay the foam centered perfectly onto the fabric. Make a mark at each corner for proper placement later. Lift the foam from the fabric. Spray an even coat of adhesive to cover the top surface of the foam completely. Lay the foam back onto the fabric using the corner marks as a guide. Flip the foam sheet over and adjust the fabric as needed. Keep the pattern running straight. Do not pull or stretch the fabric as you work. Smooth out any wrinkles, and be sure the fabric is held in place securely. Glue the outside edges of the fabric to the back of the foam. Fold the corners neatly.
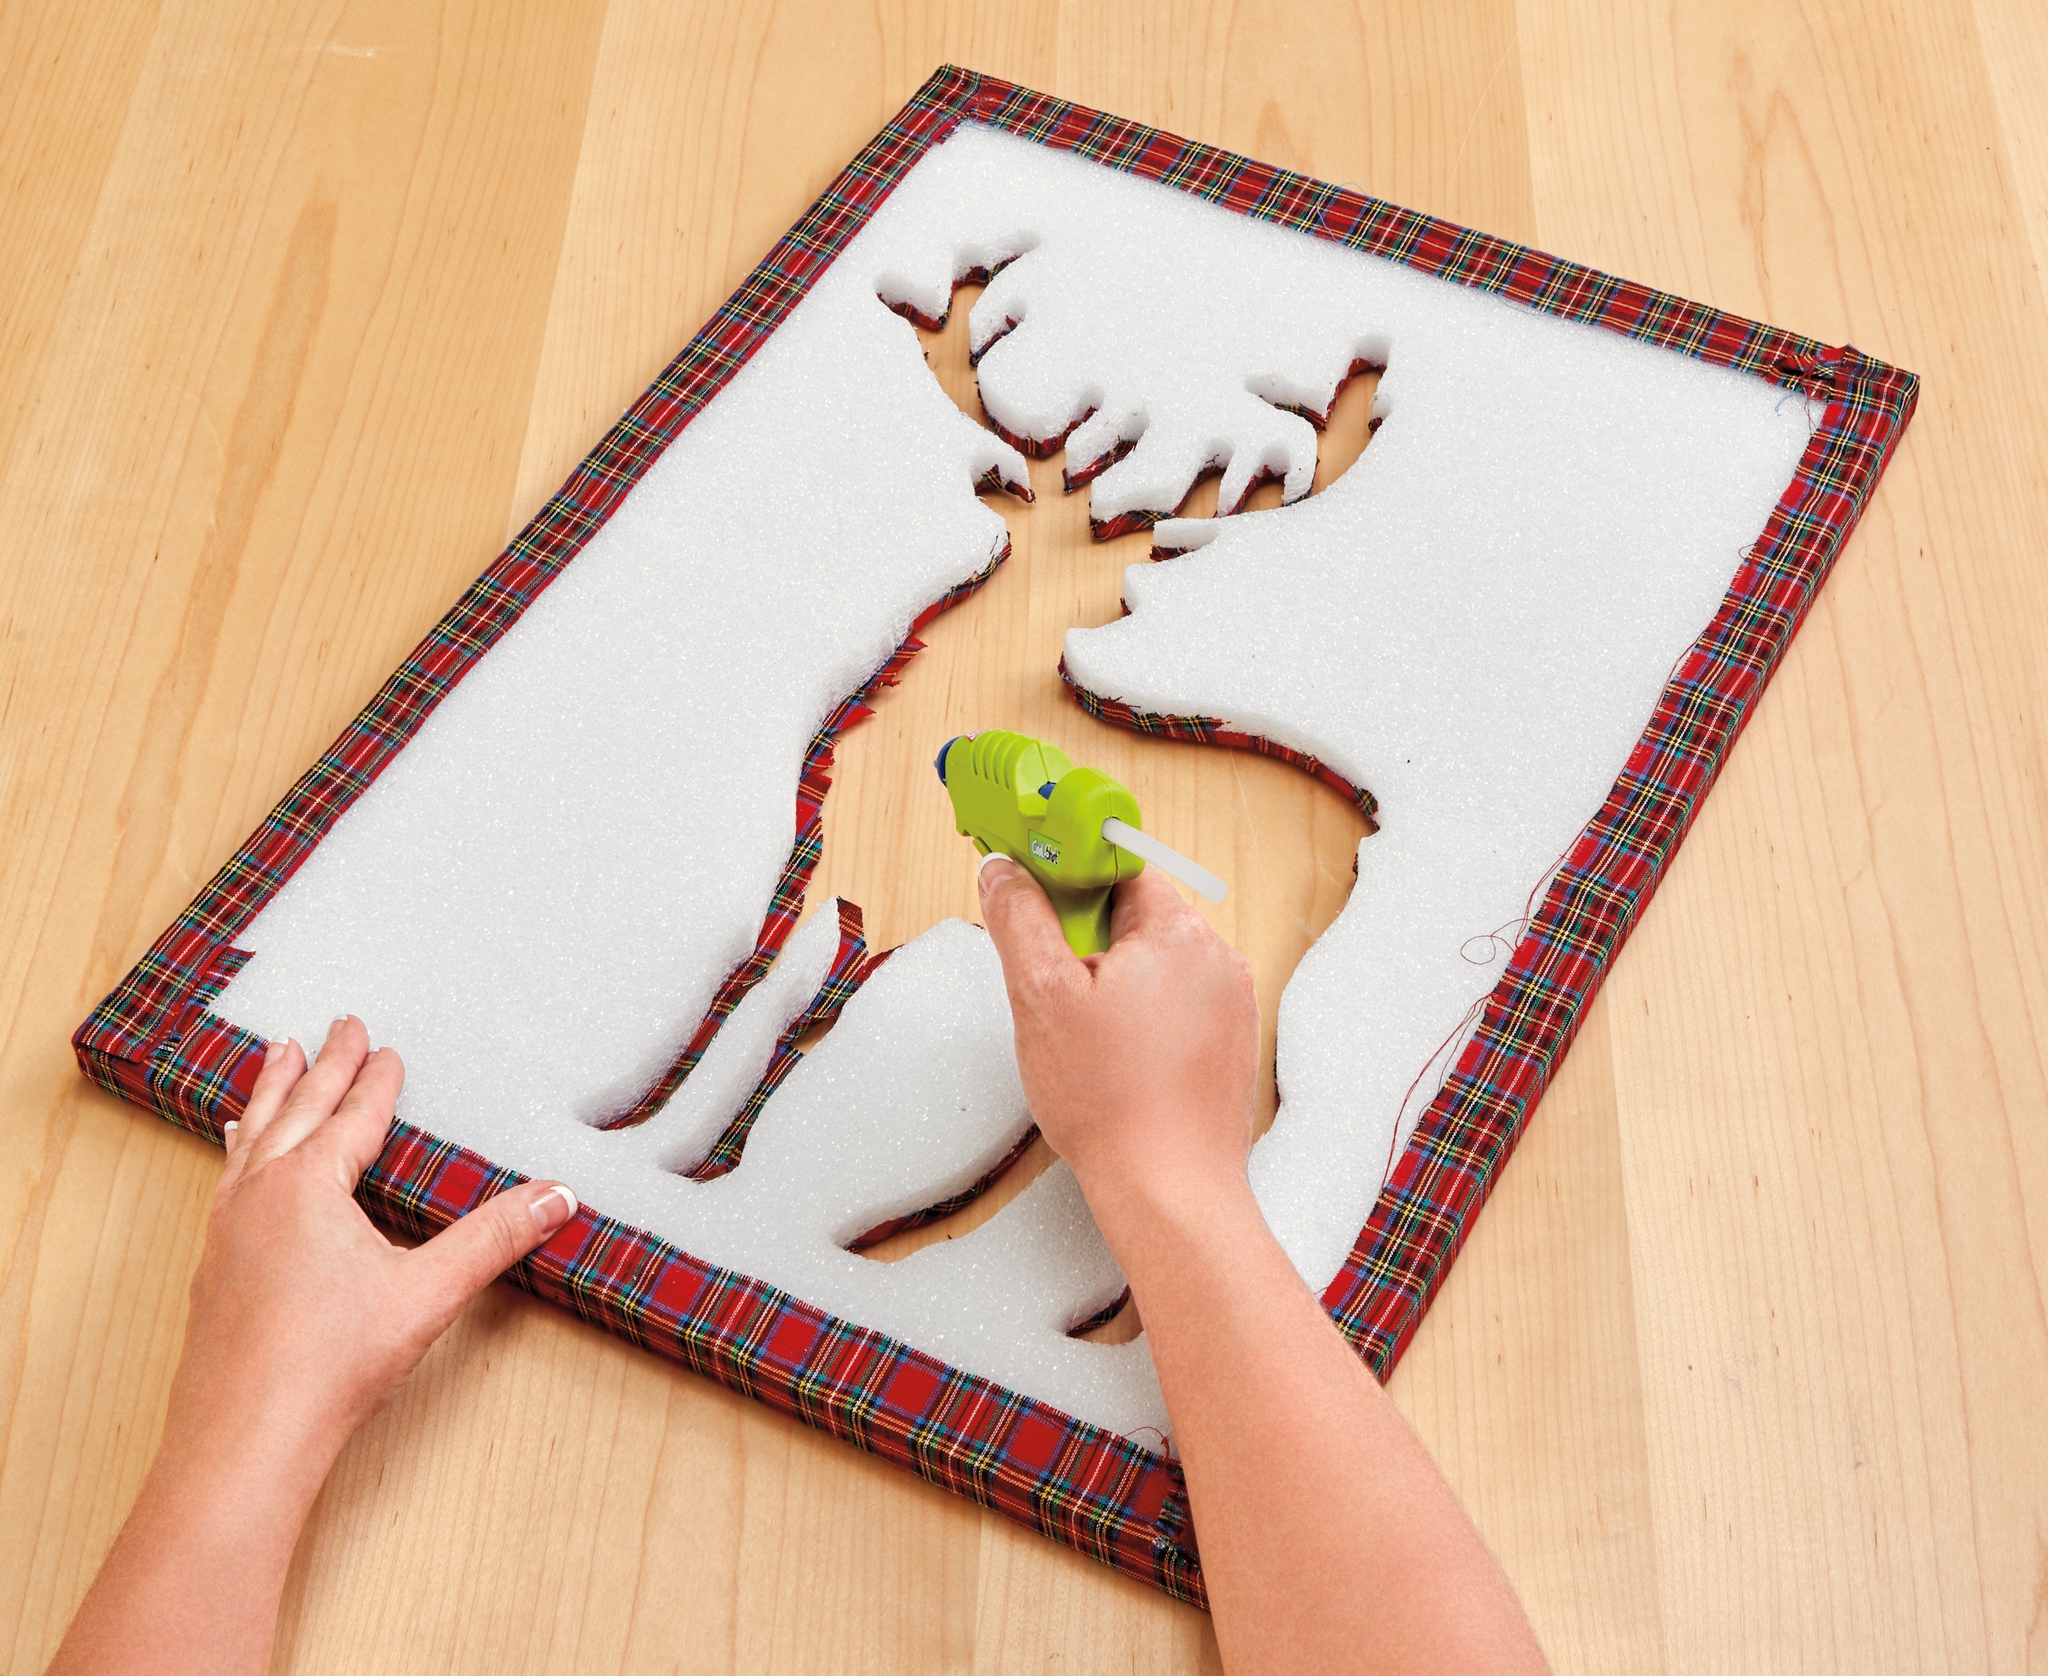
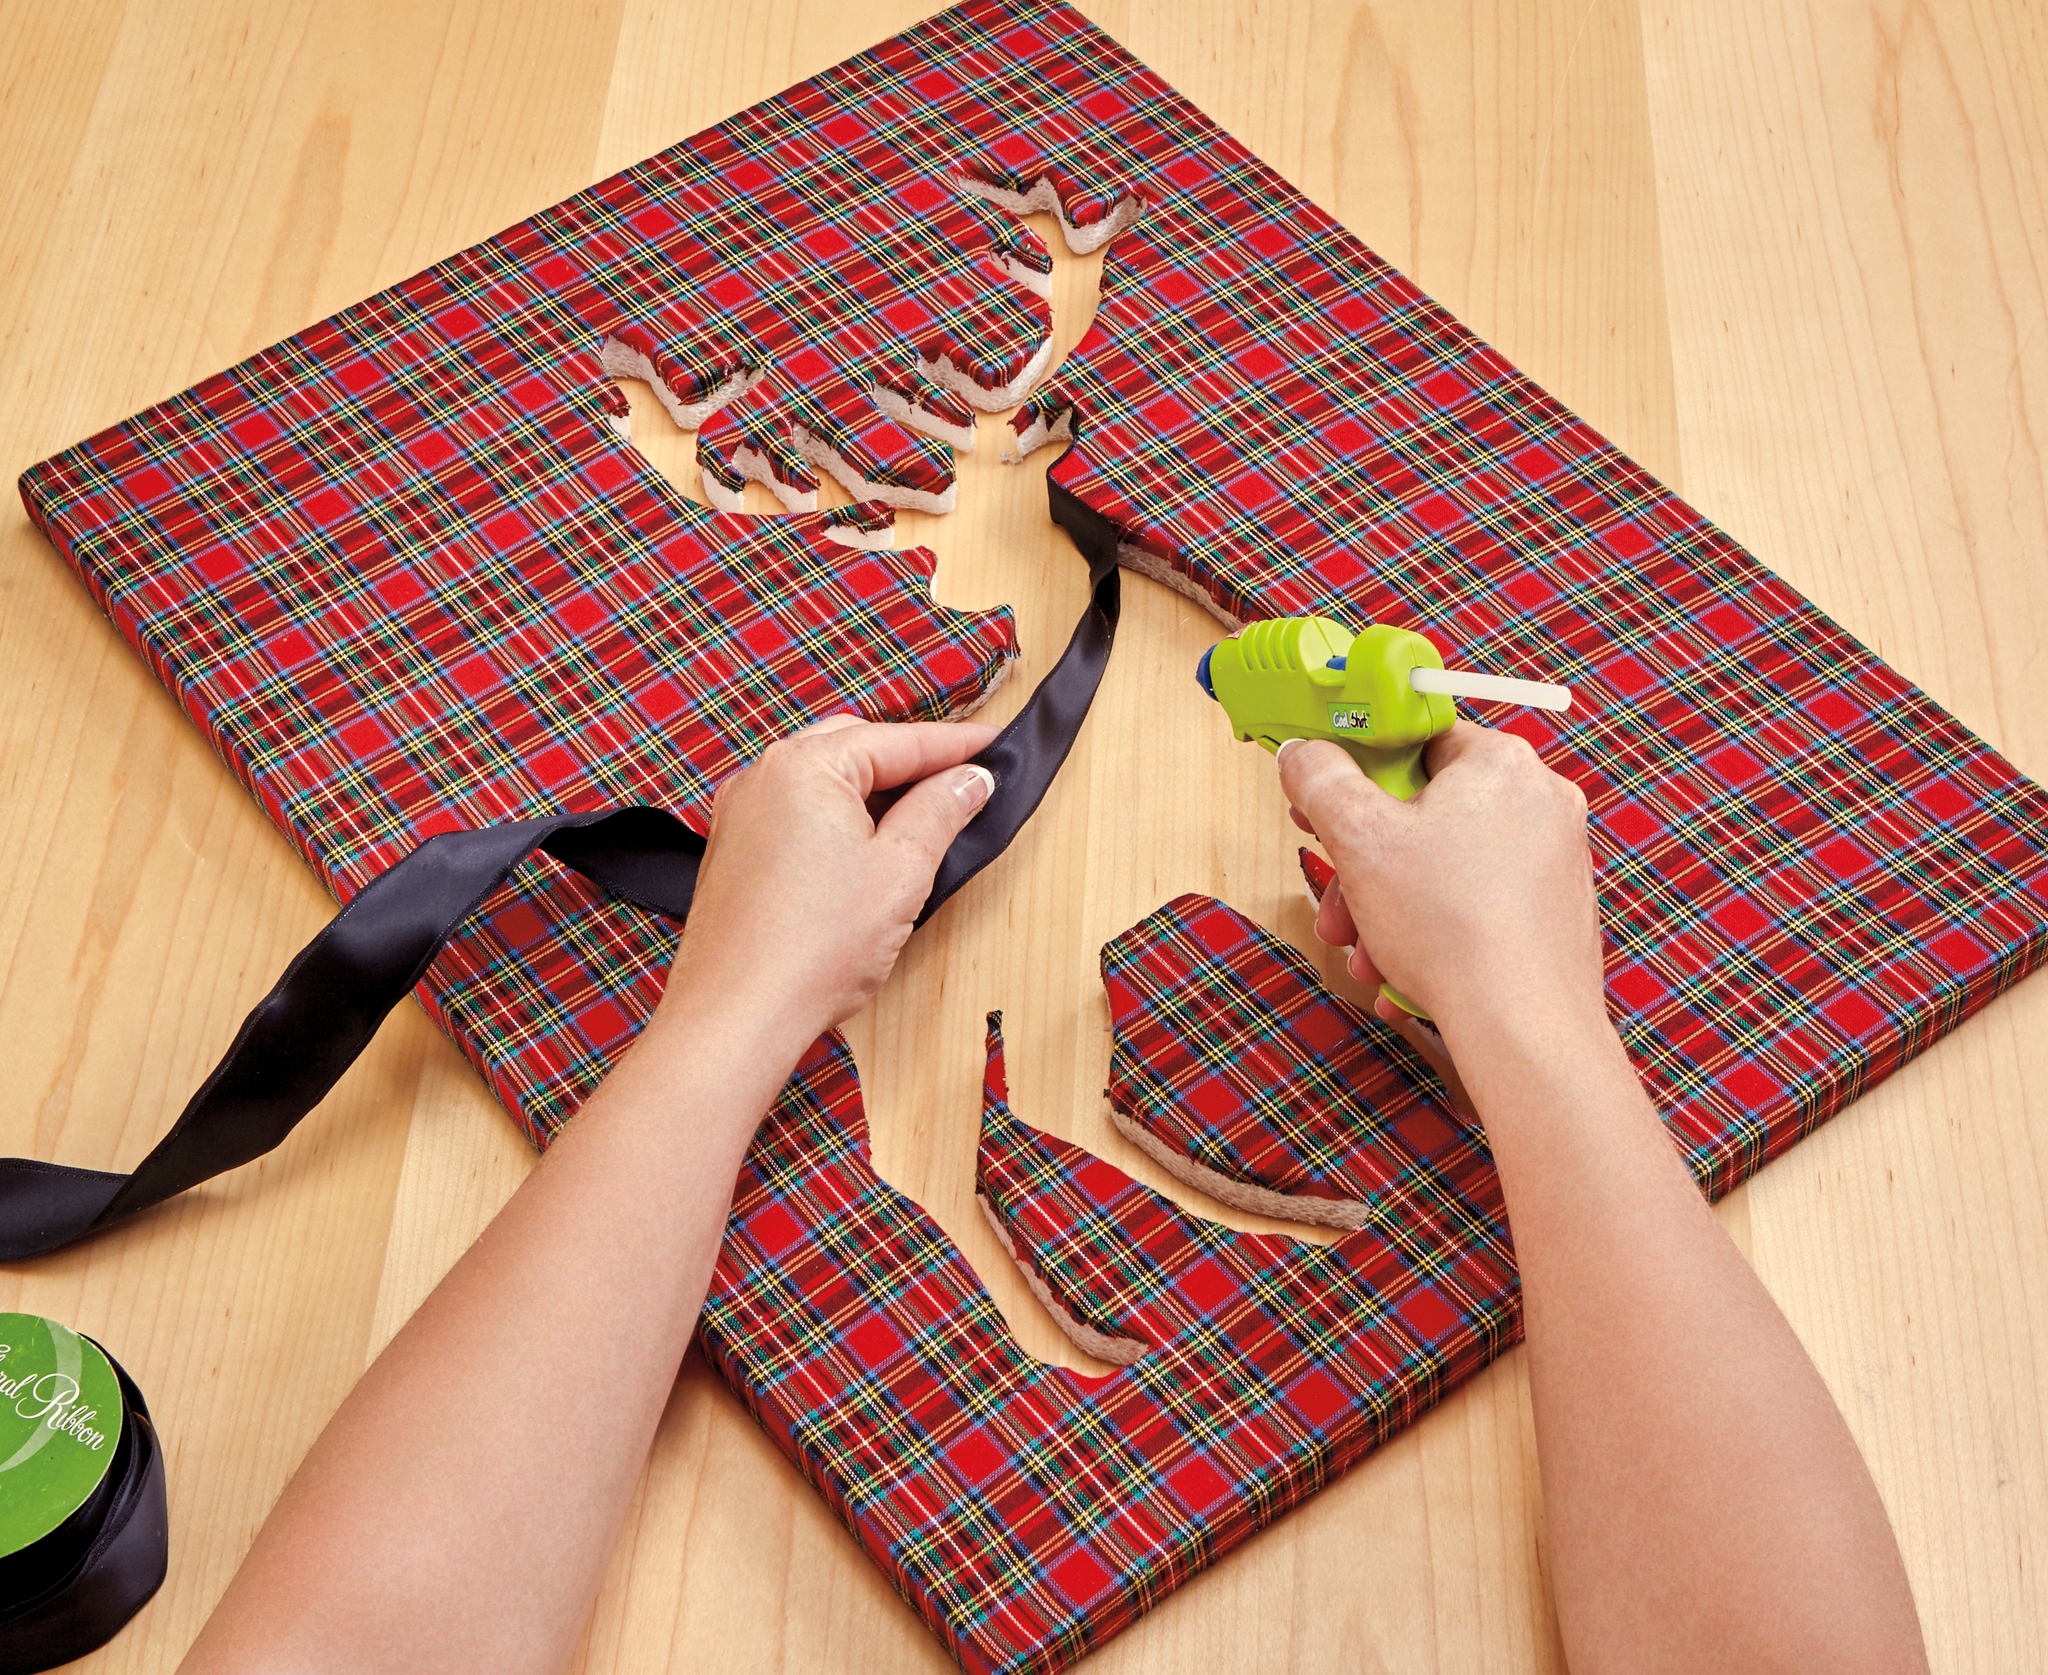
- Use small scissors to remove the fabric from the deer cut-out. You will need to leave about a ¼” fabric allowance around the edge of the cut-out. Cut small slits in the fabric around the antler areas to allow the fabric to lay nicely in the cut-out’s curved edges. Glue the fabric to the inside edge of the foam all the way around the deer cut-out using the glue gun.
- Glue the black ribbon around the inside edge of the cut-out to conceal the fabric edge.
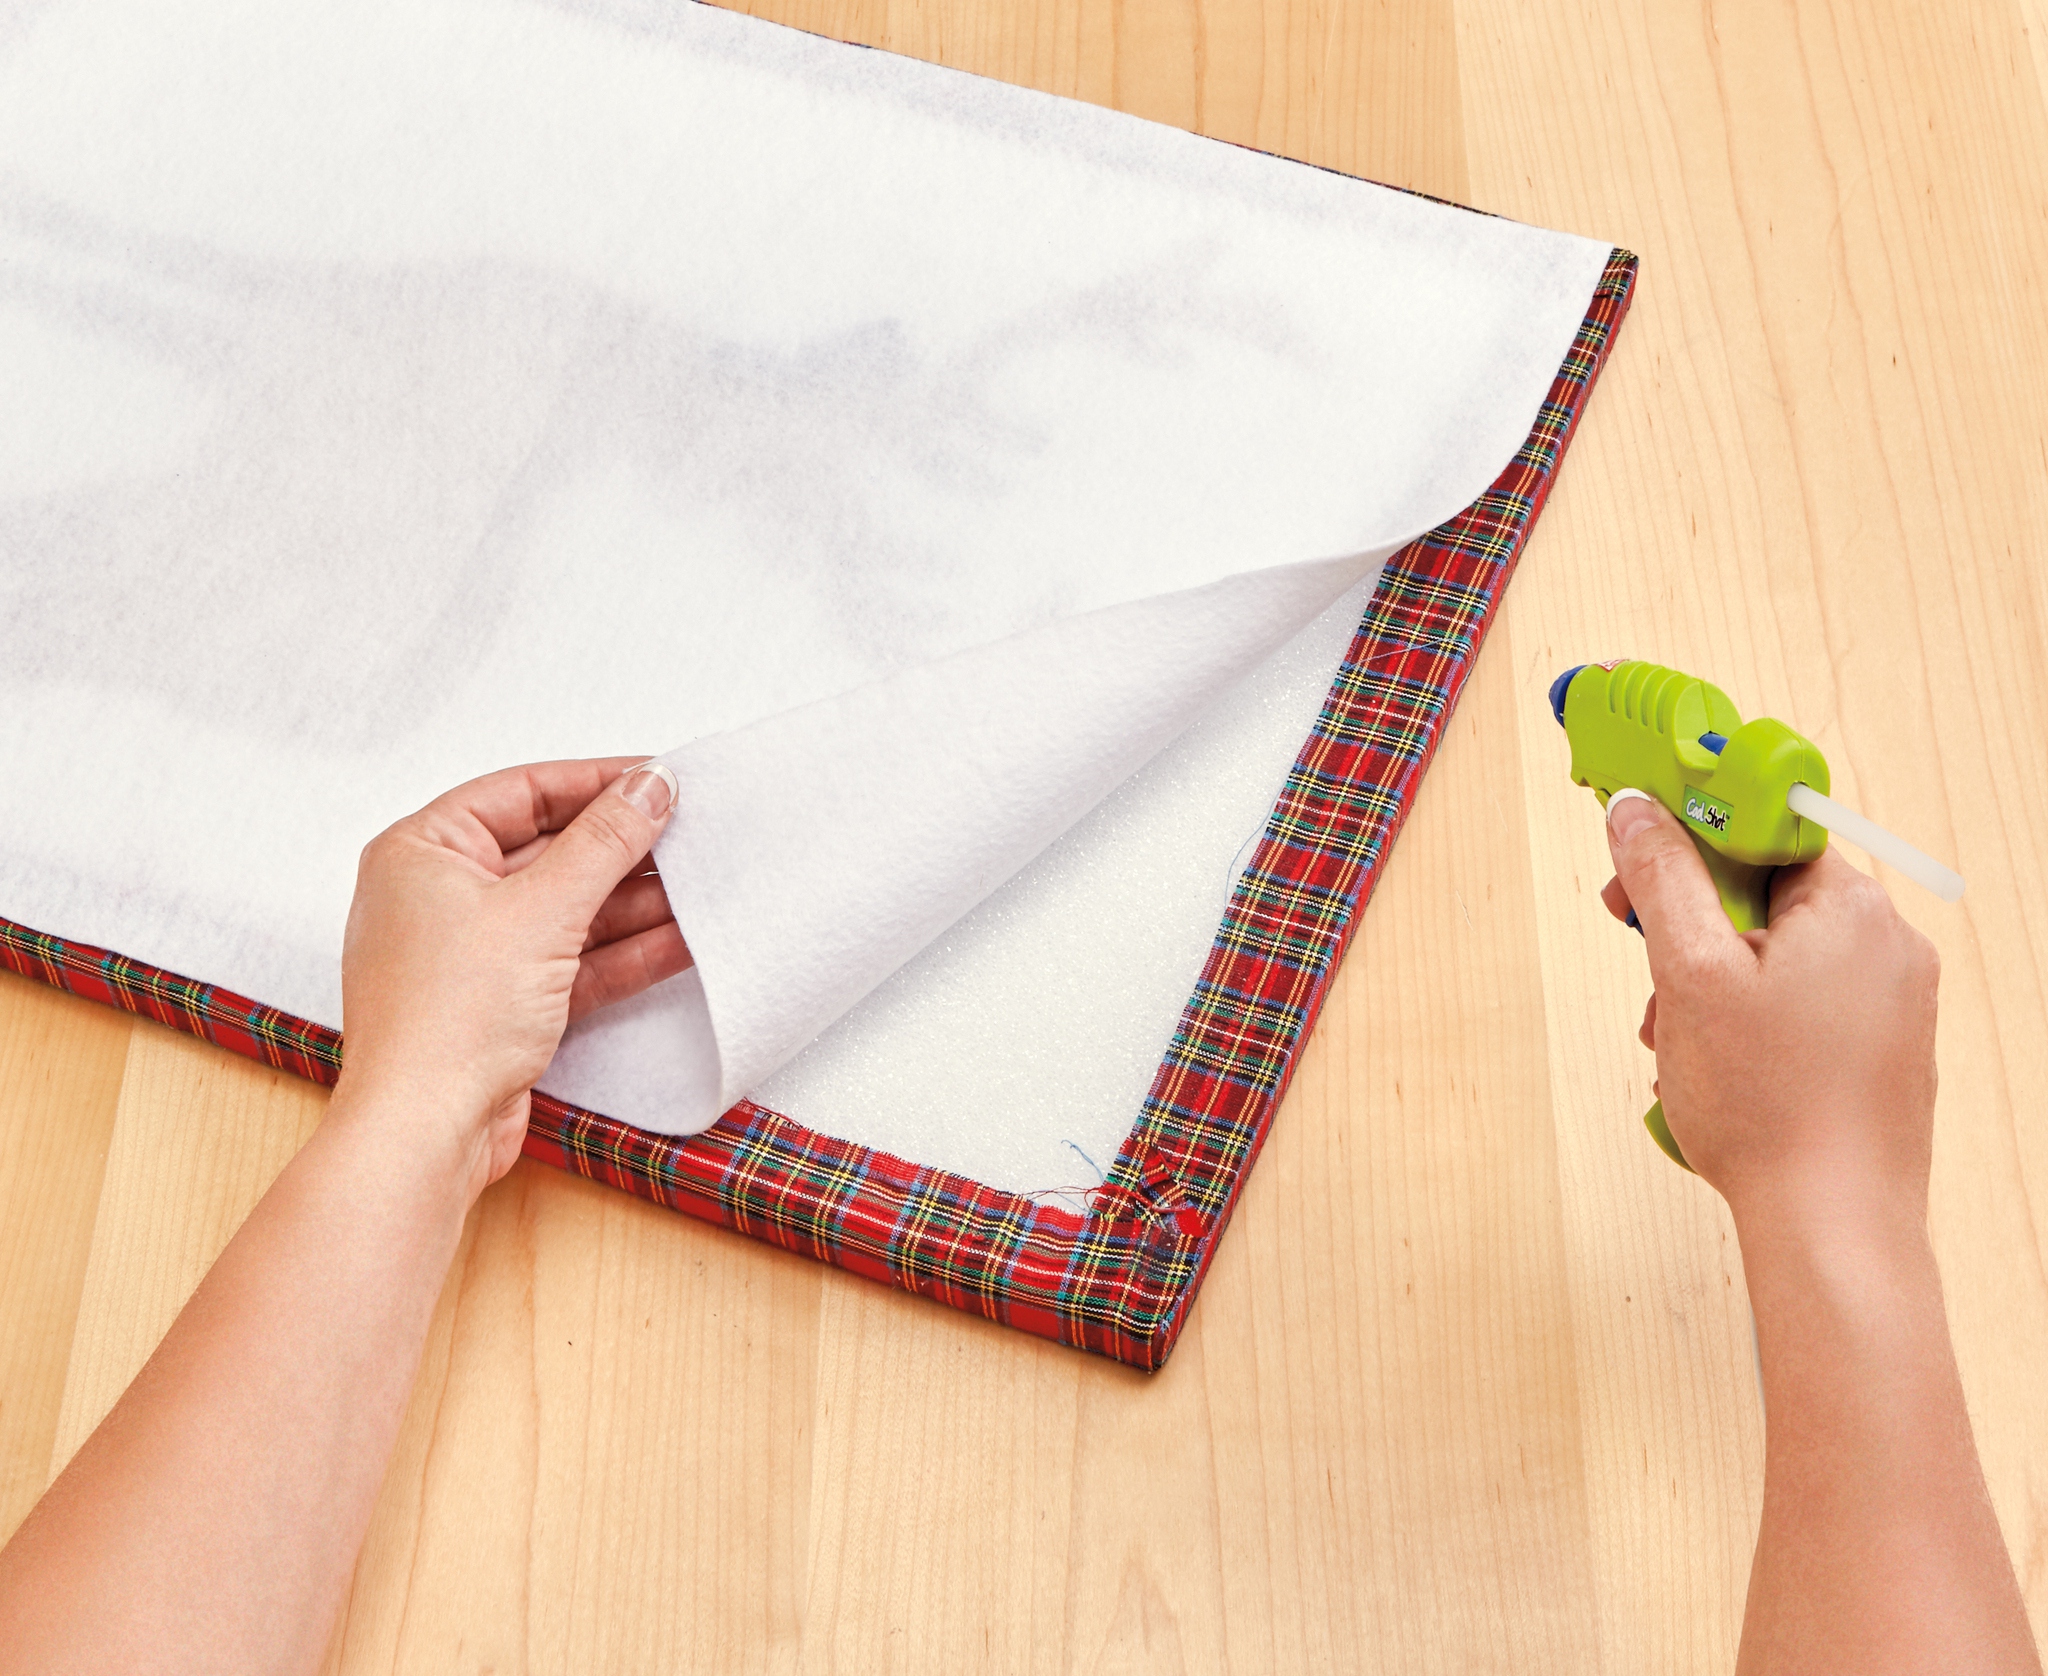
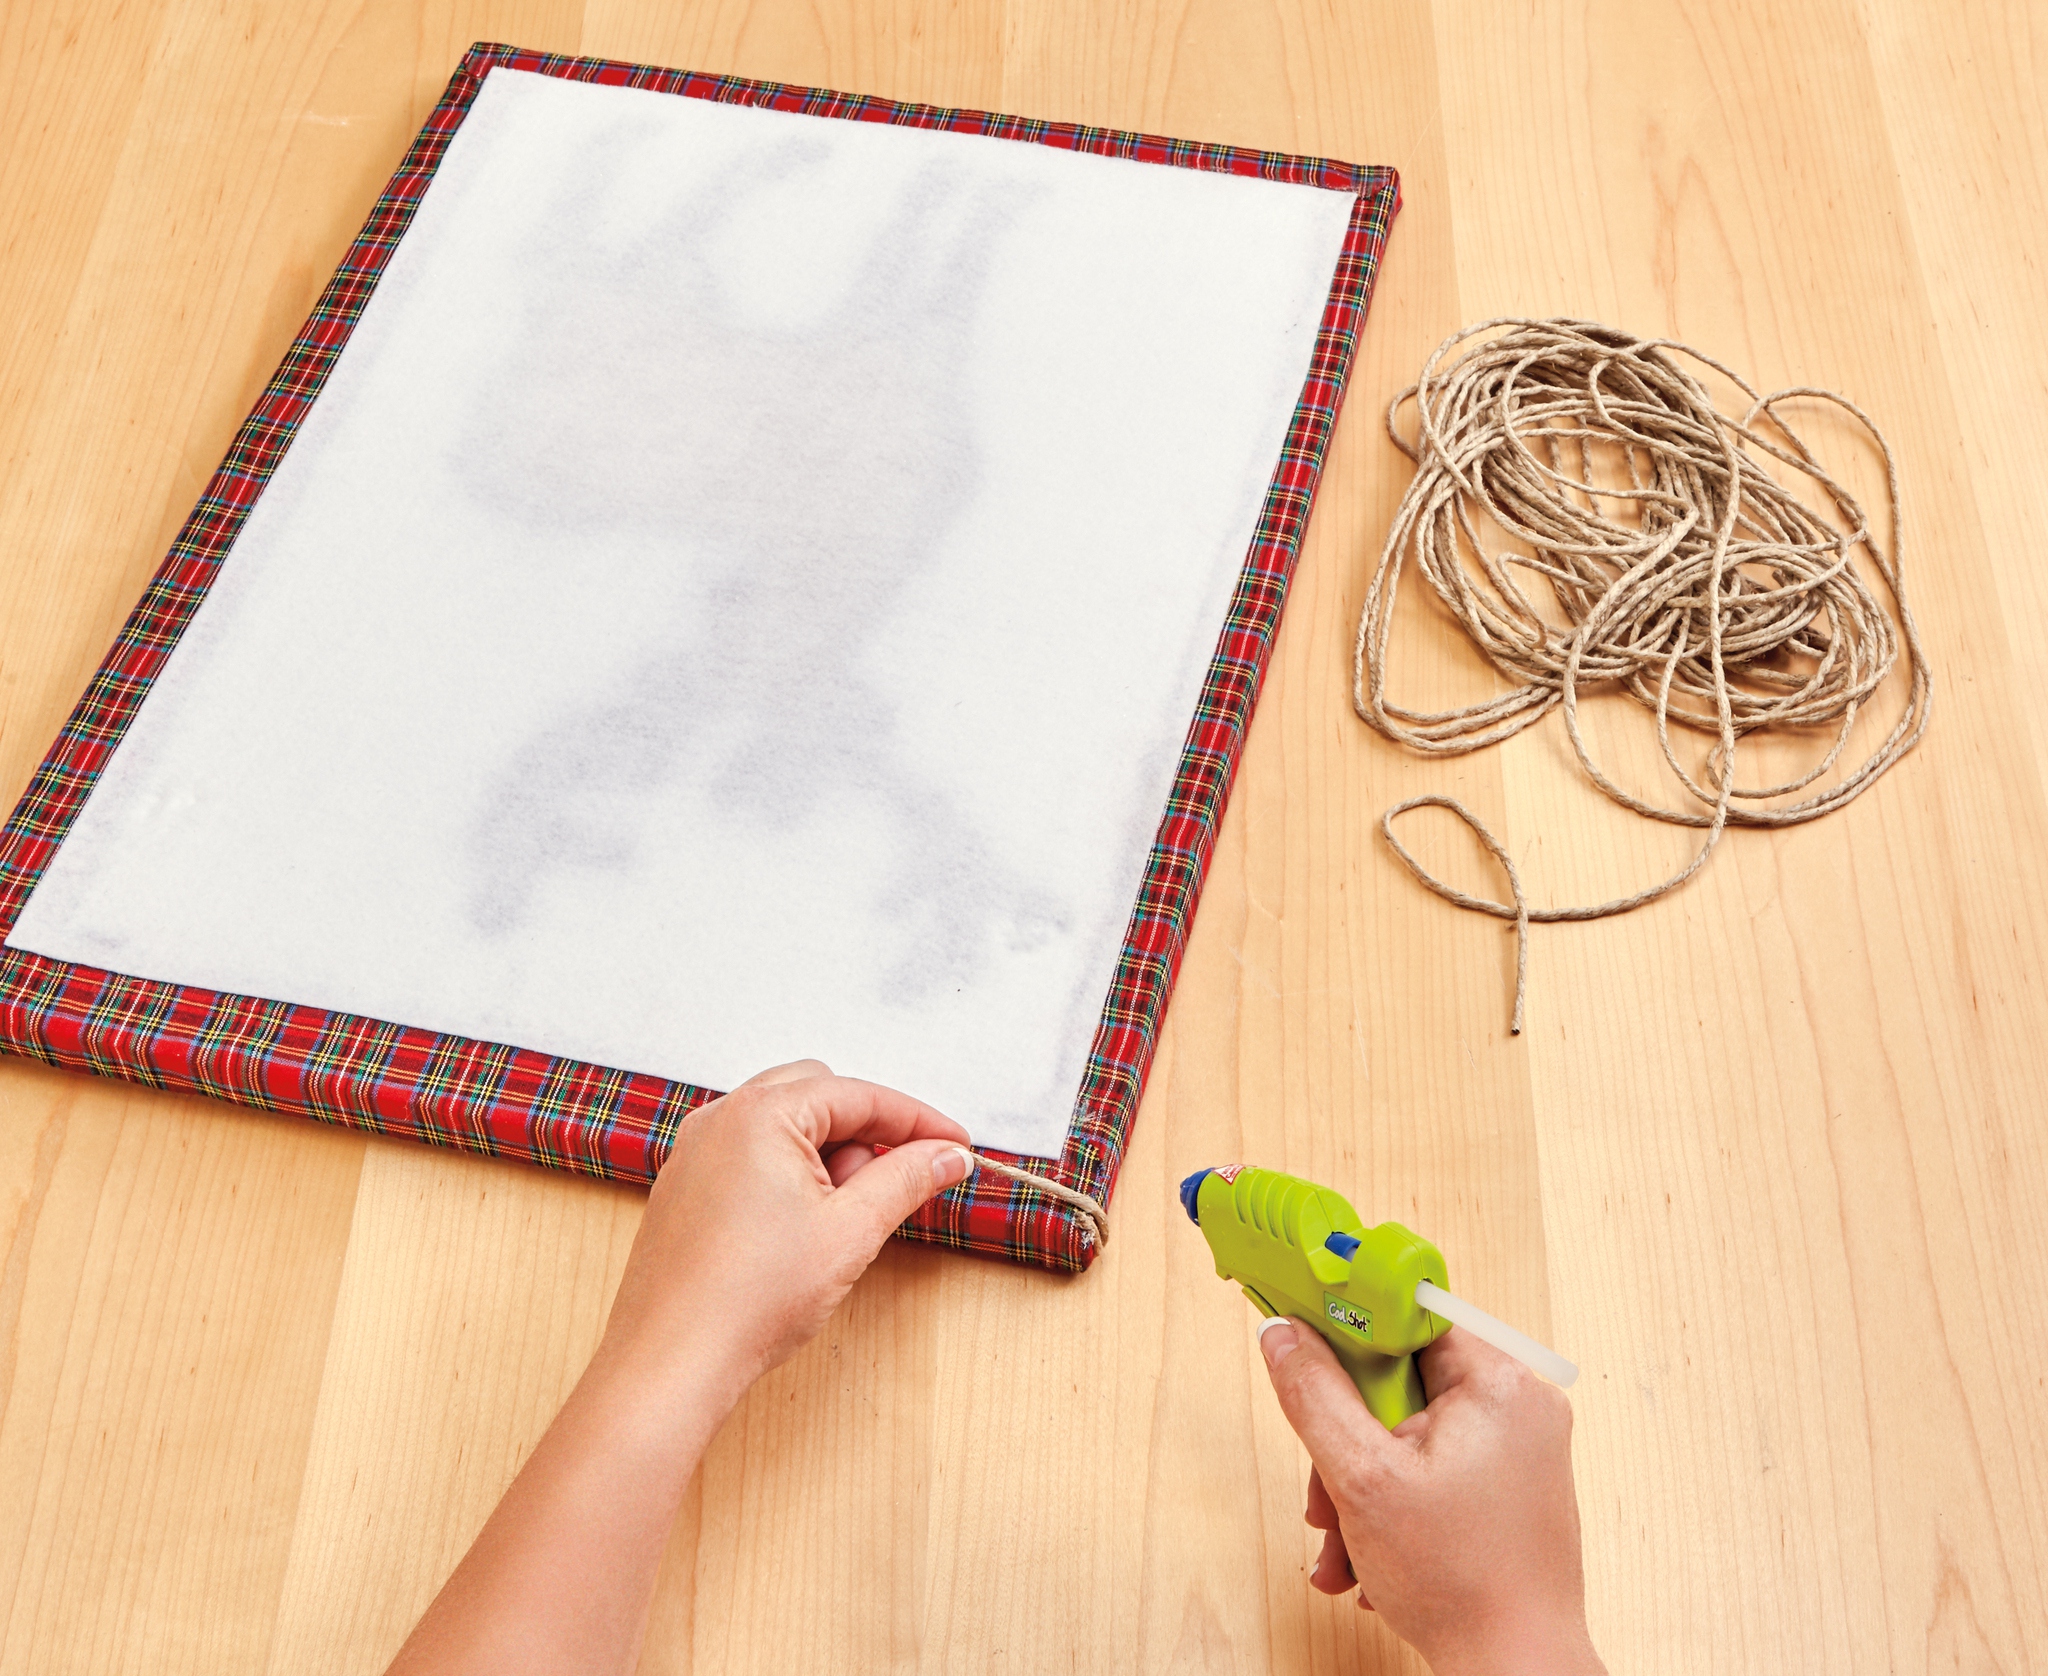
- Glue the felt to the back of the foam. Weave lengths of jute along the top and left sides of the wall art. Glue the jute at the back of the foam to secure.
-
 Celebratory Candy CakeSkill level: Beginner
 -
 Teacher Gift MugSkill level: Beginner
 -
 Bubbling Pumpkin CauldronSkill level: Beginner
 -
 Custom Charcuterie DisplaySkill level: Beginner
 -
 St. Patrick’s Day DecorSkill level: Beginner
 -
 Butterfly Pixel Wall ArtSkill level: Beginner
 -
 Fruit Appetizer TreesSkill level: Beginner
 -
 Easter Egg Table DécorSkill level: Beginner
 -
 Shamrock Porch DécorSkill level: Beginner
 -
 Eyeballs Everywhere WreathSkill level: Beginner
 -
 Narwhal Wall ArtSkill level: Beginner
 -
 Painted Cactus Wall ArtSkill level: Beginner
 Subscribe


