

Supplies
- FloraCraft® CraftFōM®:
- 1” x 12” x 36” Sheet - White
- 12” Wreath - White
- Acrylic Paint:
- White
- Red
- Orange
- (4) 12”x12” Scrapbook Paper - Music Notes
- 1” x 5 yds Satin Ribbon - Red
- Faux Cedar Sprigs
- Mini Pinecones
- Small Bead - Black
- Straight Pins
- Cardstock
- Templates:
- Letter N
- Letter E
- Letter L
- Red Bird Template
Tools
- FloraCraft® StyroCutter® Plus
- Foam Cutter or Serrated Knife
- Low-Temp Glue Gun
- Scissors
- Paint Brush
- Black Marker
Instructions
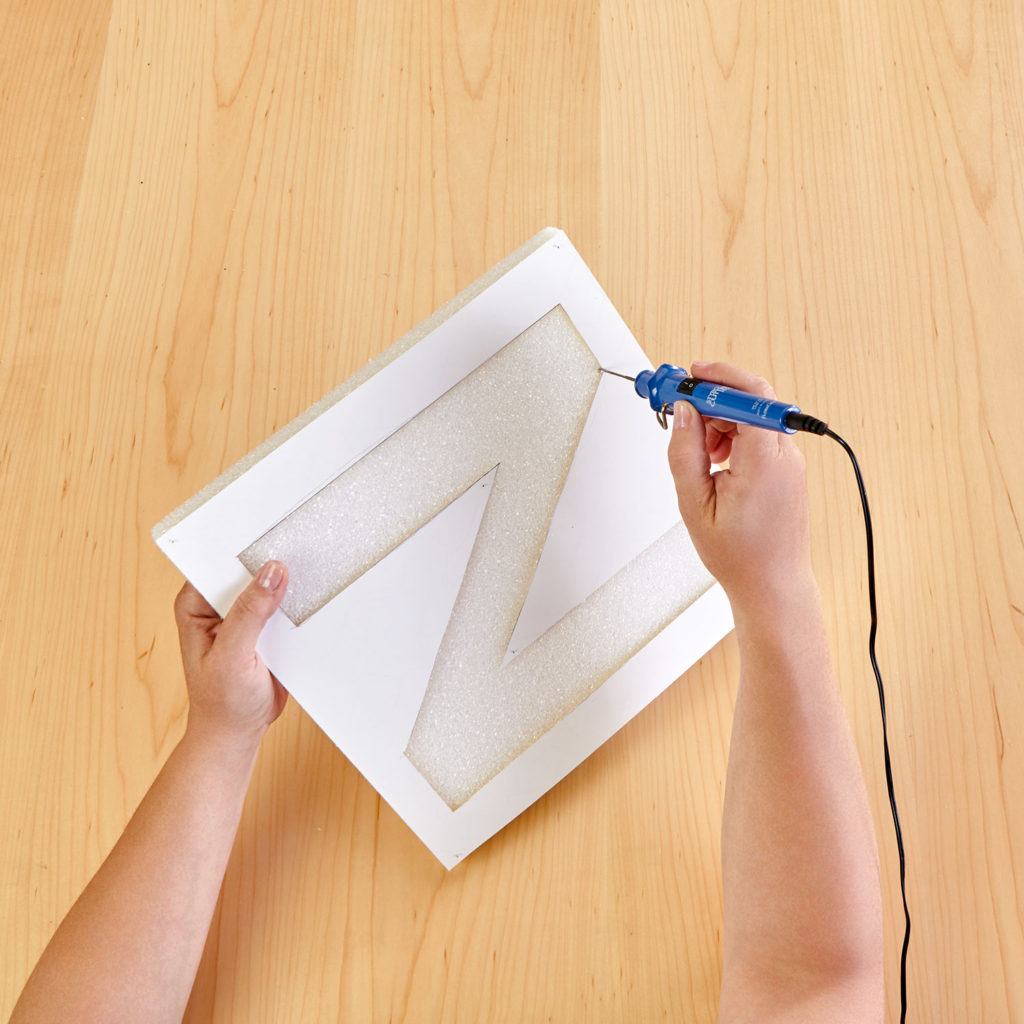
- Cut the 36” sheet into three 12” squares. Print letter and bird templates onto cardstock and cut out. Pin the templates to the 12” squares. Following the package instructions, carefully cut out the letters from the foam squares using the StyroCutter® Plus. Do not force the blade through the foam, and be sure to keep the blade at a 90-degree angle to the foam square to create straight edges on the letters. Remove the templates from the letters.
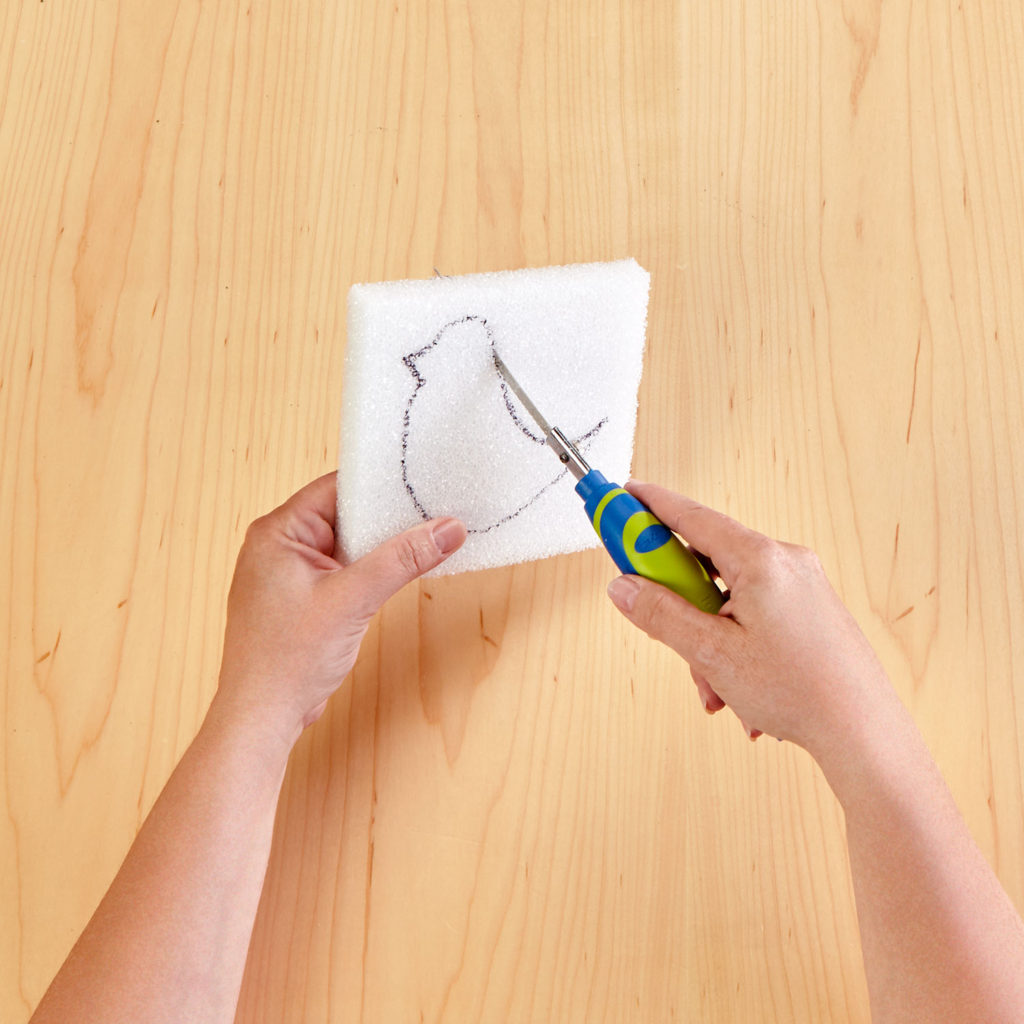
- Pin the bird template on a scrap piece of foam and trace it with a black marker. Cut out the bird shape with the serrated knife. Use a scrap piece of foam as a sanding block to round the edges of the bird shape.
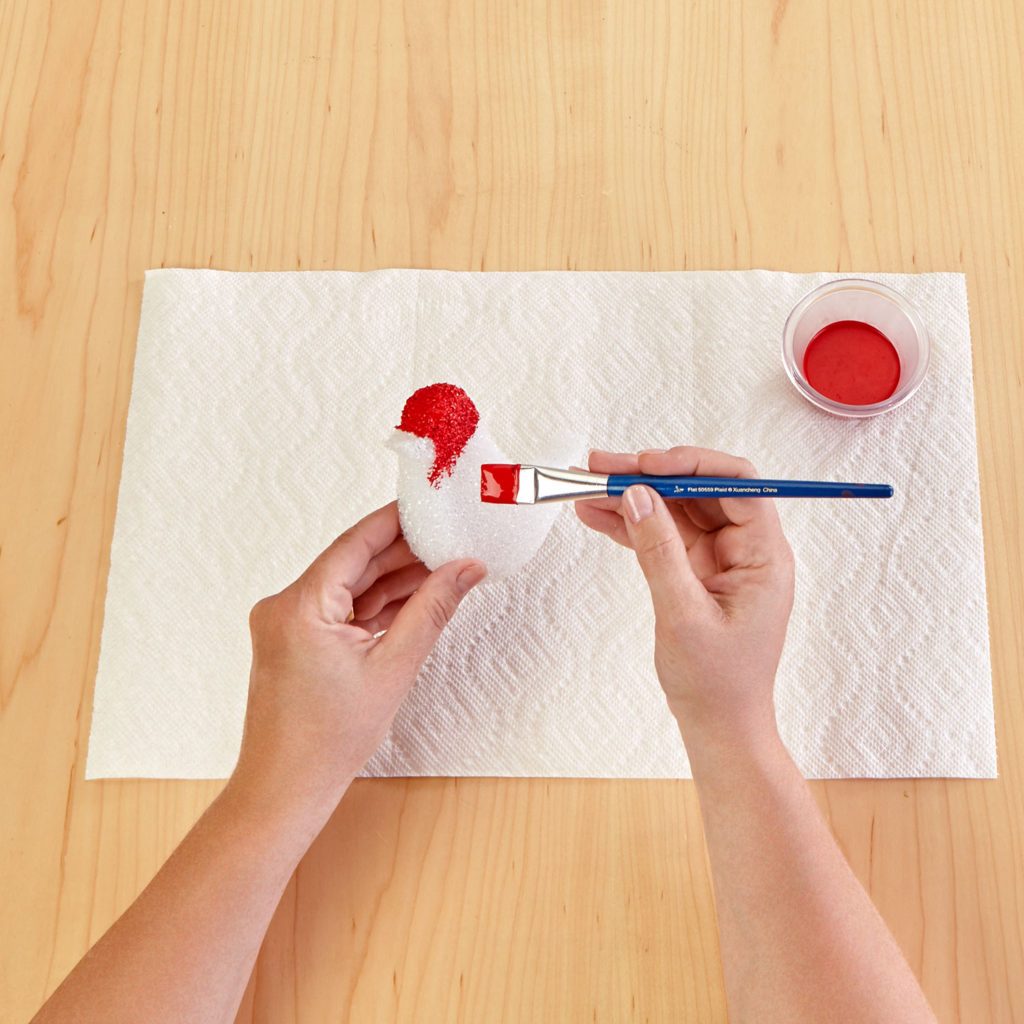
- Paint the bird red and the beak orange and let dry. Glue the black bead in place for the eye.
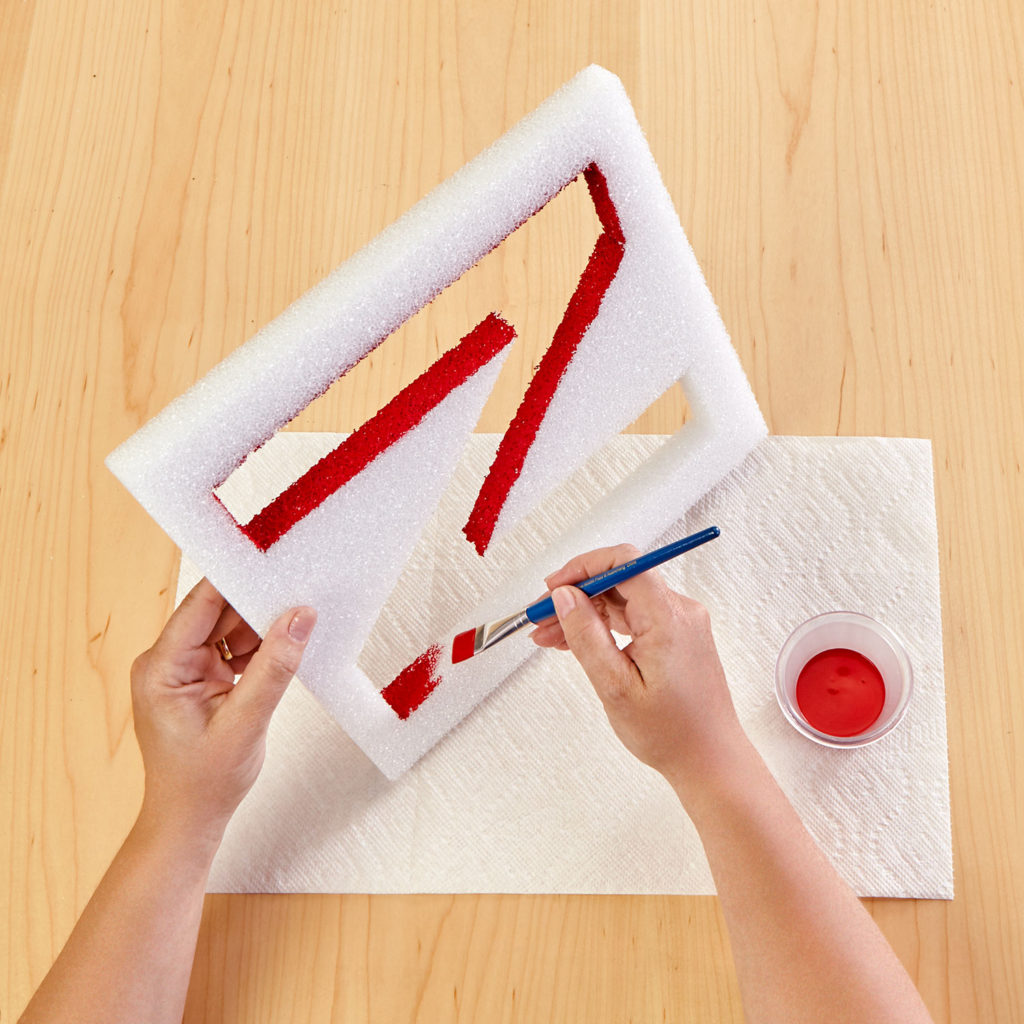
- Paint the inside edge of the wreath (the letter “O”) red and let dry. Paint the inside edges of all the letters red and let dry. Paint the front and outside edges of the wreath and all the letter squares white and let dry.
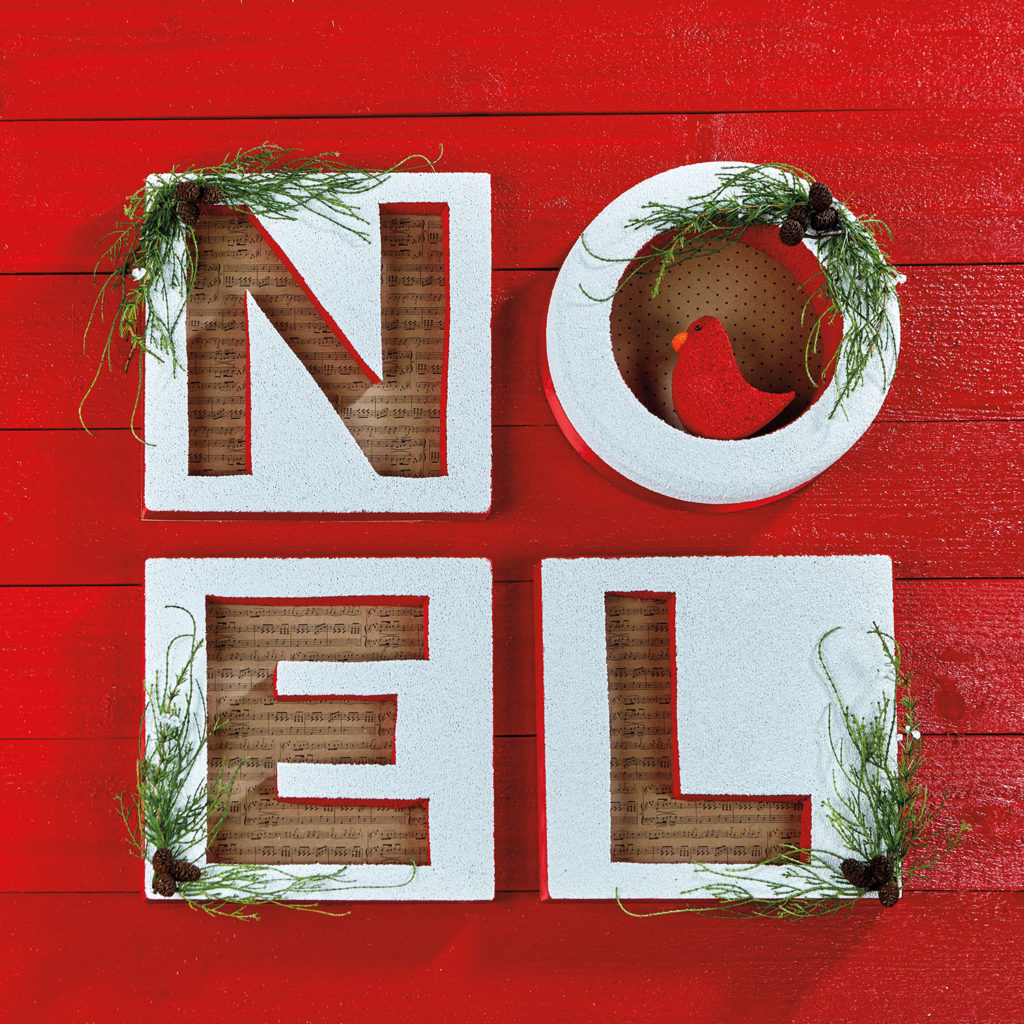
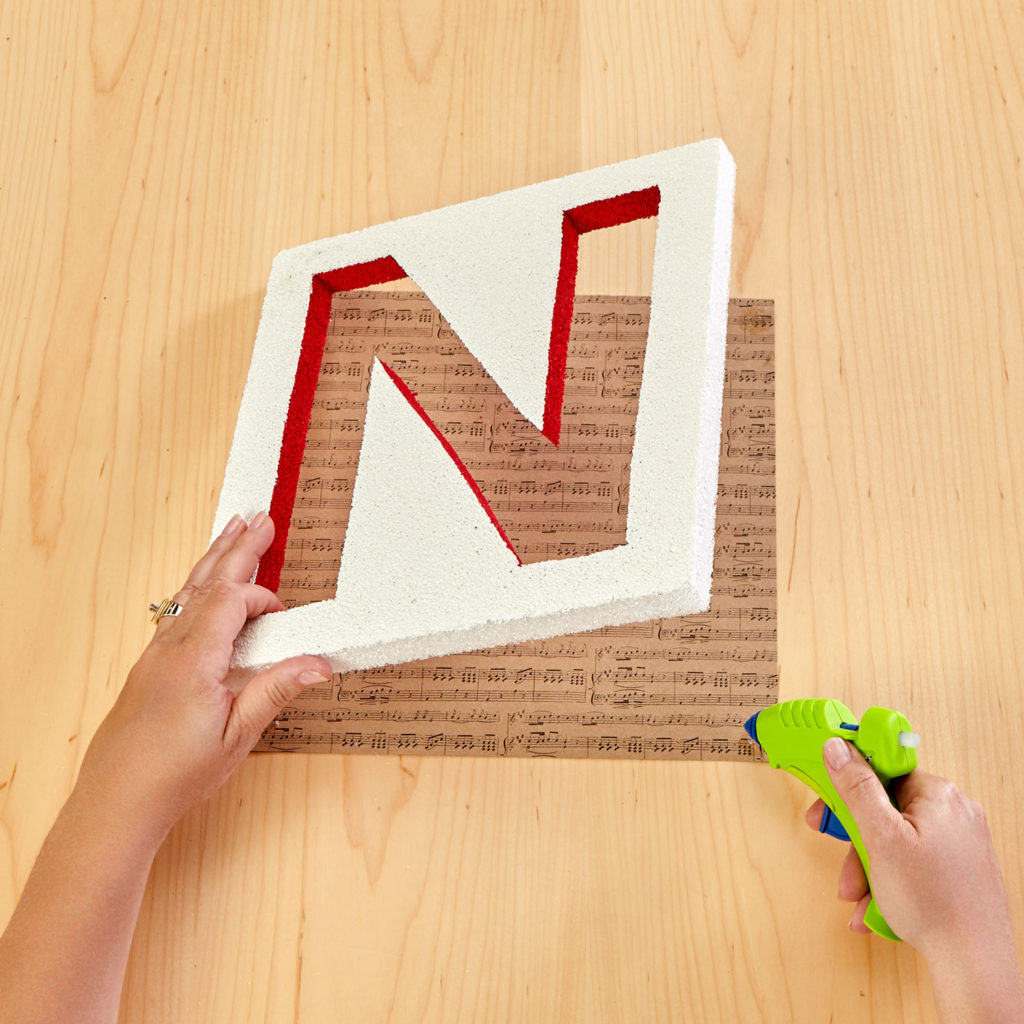
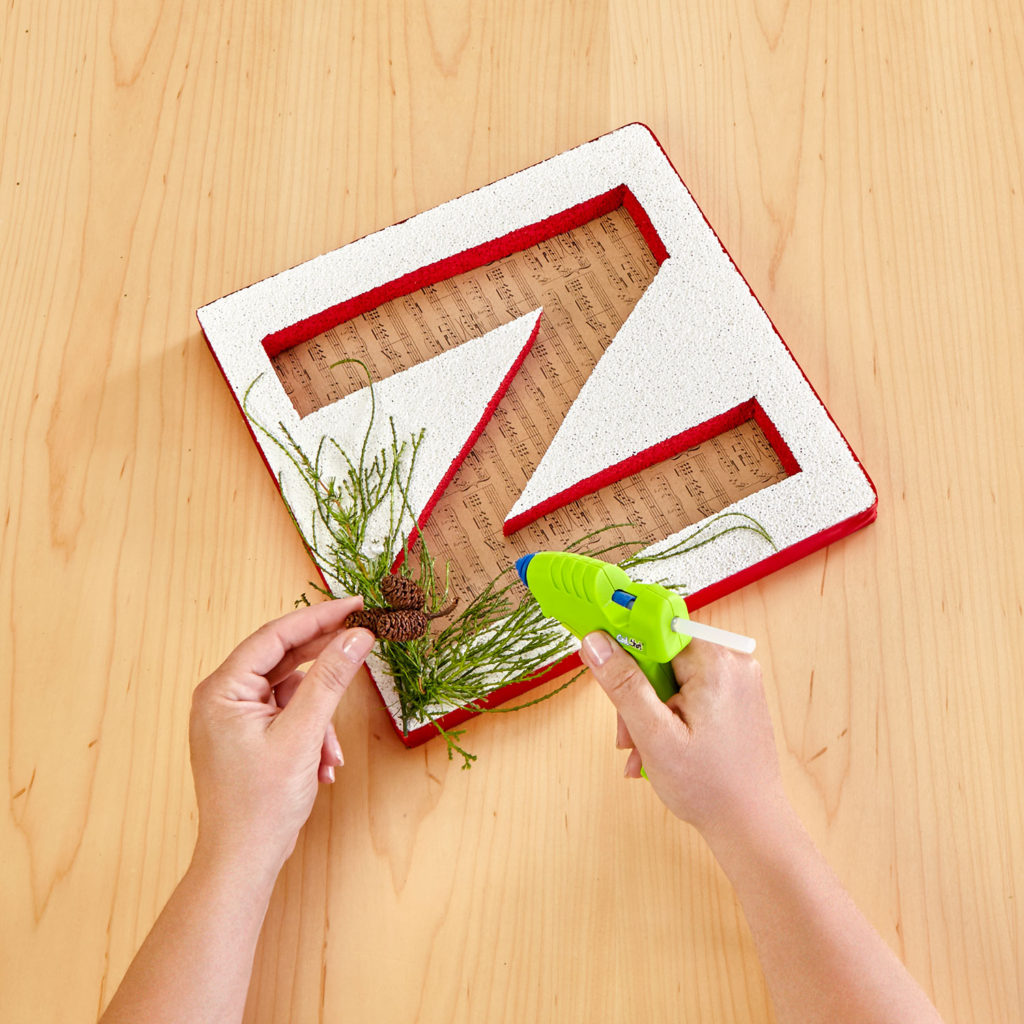
- Glue scrapbook paper to the back of the letter squares. Cut the paper to fit the back of the wreath and glue it in place—Glue red satin ribbon to the outside edge of all four letters. Embellish the letters by adding cedar sprigs and pinecones with glue. Glue the bird inside the wreath as shown.
-
 Celebratory Candy CakeSkill level: Beginner
 -
 Teacher Gift MugSkill level: Beginner
 -
 Bubbling Pumpkin CauldronSkill level: Beginner
 -
 Custom Charcuterie DisplaySkill level: Beginner
 -
 St. Patrick’s Day DecorSkill level: Beginner
 -
 Butterfly Pixel Wall ArtSkill level: Beginner
 -
 Fruit Appetizer TreesSkill level: Beginner
 -
 Easter Egg Table DécorSkill level: Beginner
 -
 Shamrock Porch DécorSkill level: Beginner
 -
 Eyeballs Everywhere WreathSkill level: Beginner
 -
 Narwhal Wall ArtSkill level: Beginner
 -
 Painted Cactus Wall ArtSkill level: Beginner
 Subscribe


