
Supplies
- FloraCraft® CraftFōM®:
- (3) 2 7/8" x 5 7/8" Cone - White
- (1) 3" Ball - White
- (1) 4" Ball - White
- A Scrap of Foam (To Hold Painted Foam While Drying)
- 18-23 Multi-Color Rocks
- Spanish Moss
- 10" x 14" x 6" Wood Crate - Gray Finish (Optional)
- Acrylic Paint:
- Shale Green
- Antique Green
- Driftwood
- Soft Sage
- Oyster Beige
- 6" x 14" Cardboard (To Fit Inside Crate, On One Side)
Tools
- Medium Paintbrush
- Pencil
- Serrated Knife
- Small Spoon
- Rubberband
- Toothpicks
- Container of Water
- Paper Plates
- Paper Towels
- Hot Glue Gun and Glue Sticks
Instructions
- For the two smaller toadstool bases, use a serrated knife to cut points off two cones, 3″ and 3 1/2″ down from the top. (Tip: To make the cut straight, mark the distance with a pencil, wrap a rubber band around the cone and adjust until straight. Then cut right alongside the rubber band.)
- For the toadstool tops, use a serrated knife to cut two balls in half (also using rubber band technique, if desired.) Set aside one half of the 4″ ball for another project.
- If any cut edges are irregular, rub together two parts of the ball over a plastic-lined wastebasket to sand them down. Also, roll edges on the table to compress for a smooth roundness—similarly, each cone’s smooth bottom edge. Use a serrated knife and small spoon to hollow out 1″ circle in the center on the flat side of each ball half for the cone to fit. Dig down about 1/2″ deep, checking that cone will fit snugly.
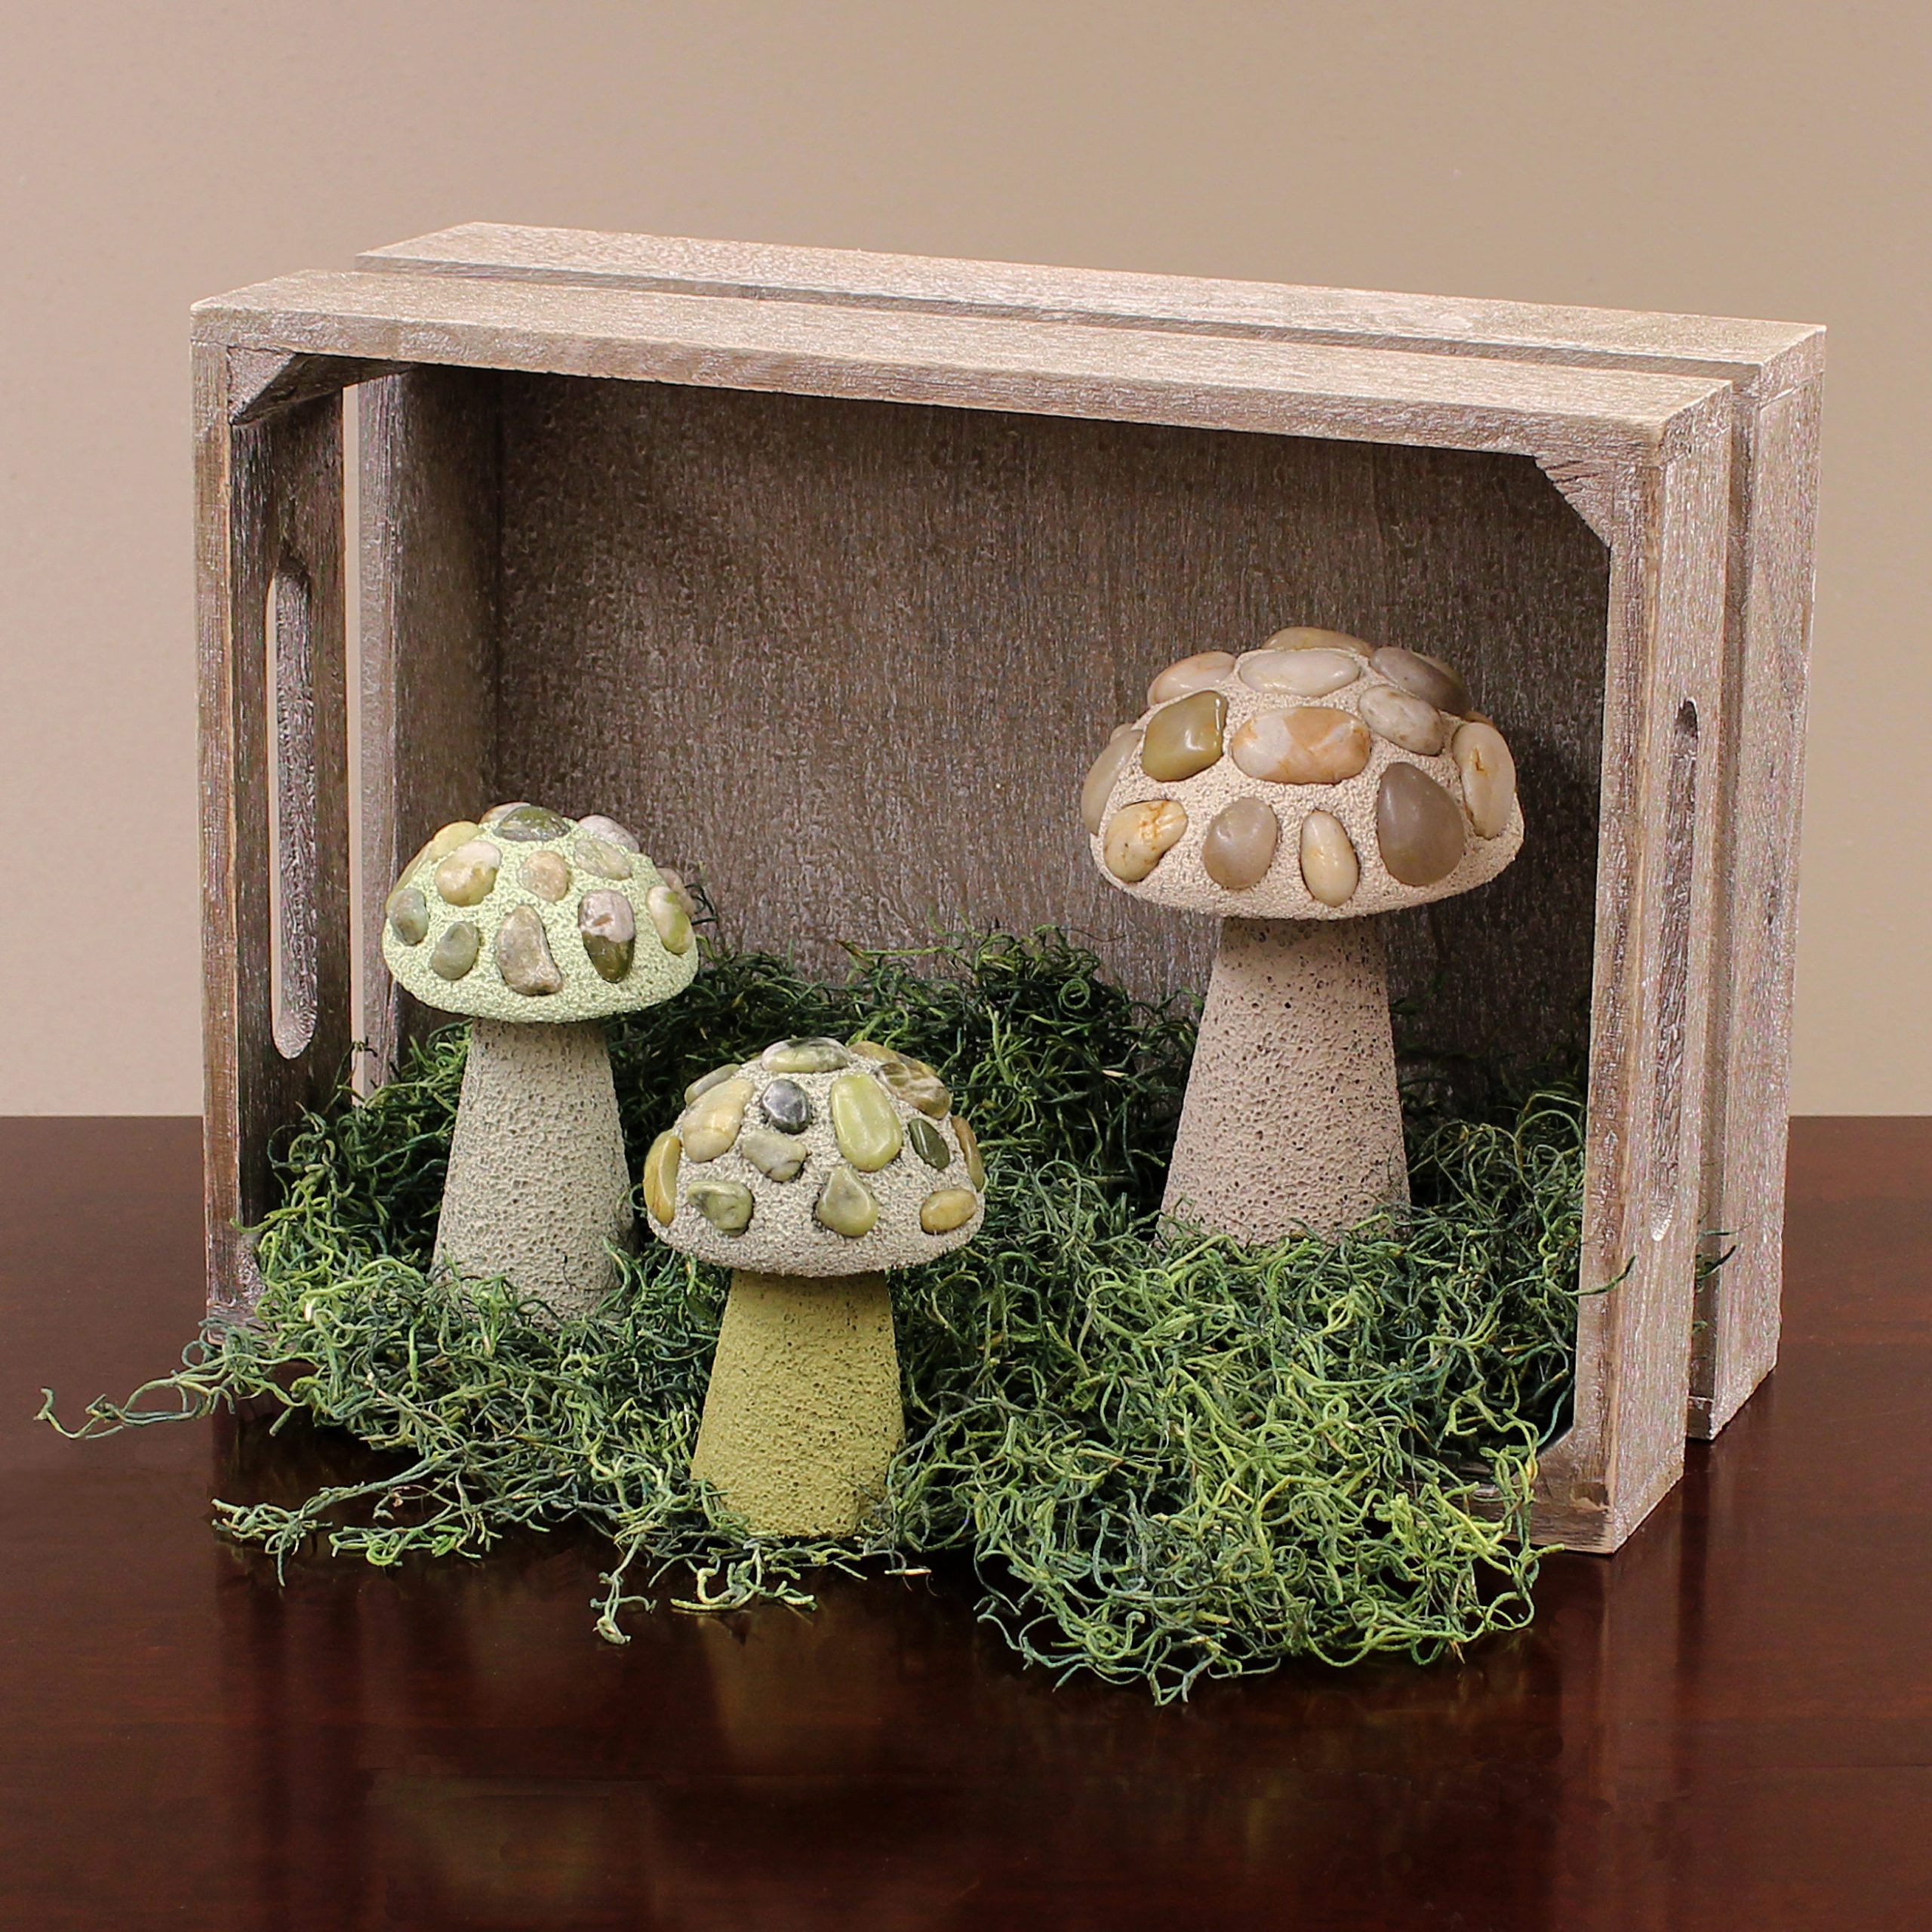
- Squeeze paint onto a paper plate(s) and paint Large cone – Driftwood; medium cone – Shale Green; small cone – Antique Green; large ball half – Oyster Beige; two small halves – Soft Sage and Shale Green. As you finish each piece, insert a toothpick into the bottom and insert the other end into scrap Foam to let them dry.
- From rock containers, sort for both size and color as follows: Large ball half – 18 to 20 large, lighter beige/gray rocks; medium ball half (that is painted Soft Sage) – 18 – 23 small, light green rocks; medium ball half (that is painted Shale Green) – 18 – 23 small medium and dark green rocks.
- With one small ball half flat on a table, start at the top center and press one rock into foam. Go down far enough that rock will stay in place. Place next rock about 1/8″ – 1/4″ away, positioning it so that it fits like a puzzle piece, without touching. (Tip: Use a large marker or glue stick barrel to help press rocks into foam, if needed.) Continue working all-around center rock. Then, do another row or two, depending on the rocks’ size, until the ball half is evenly covered. One at a time, remove rocks, apply glue gun glue to the bottom of the rock, and press back into place to secure all rocks permanently. Repeat with other small and large ball halves.
- To assemble toadstools, gently press cone bases into ball half tops. Set on table to adjust until straight. Then remove the hot glue top of the cone and press it back into place to permanently secure.
- Turn the crate on its side and set cardboard inside (on the side that is now the bottom). Place moss on cardboard, allowing it to flow outside the crate. Set toadstools nestled into the moss. (Tip: Since toadstools are a little top-heavy, clear away moss from underneath them so they can be flat on the table for stability.)
-
 Celebratory Candy CakeSkill level: Beginner
 -
 Teacher Gift MugSkill level: Beginner
 -
 Bubbling Pumpkin CauldronSkill level: Beginner
 -
 Custom Charcuterie DisplaySkill level: Beginner
 -
 St. Patrick’s Day DecorSkill level: Beginner
 -
 Butterfly Pixel Wall ArtSkill level: Beginner
 -
 Fruit Appetizer TreesSkill level: Beginner
 -
 Easter Egg Table DécorSkill level: Beginner
 -
 Shamrock Porch DécorSkill level: Beginner
 -
 Eyeballs Everywhere WreathSkill level: Beginner
 -
 Narwhal Wall ArtSkill level: Beginner
 -
 Painted Cactus Wall ArtSkill level: Beginner
 Subscribe


