
Supplies
- FloraCraft® CraftFōM®:
- 6" Ball - White
- 2.5" Burlap Ribbon - Cream
- Accent Faux Fall Leaves
- Acrylic Paint - Gold
- 1" x 4' Stick
Tools
- Foam Cutter
- Scissors
- Glue Gun and Glue Sticks
- Paint Brush
- Paper Towel
- Spoon
Instructions
- Use foam cutter to remove approx. 4 1/2″ diameter circle off top and bottom of Foam Ball. On top and bottom, use spoon to scoop out area, going about 2″ deep. Use Foam Cutter to smooth any edges, so foam goes smoothly from outside into a bowl-like area. On top, only the inside center of the bowl area, carve out about a 1 3/4″ diameter, 1″ deep hole (for stem). (Note: Hole should be slightly larger than stick diameter since burlap will go over the hole’s edge to conceal ribbon ends.)
- Cut eleven 12″ lengths of 2 1/2″ wide Wired Burlap Ribbon.
- To cover the Ball, glue the end of one length ribbon to the top, barely going over into the hole near the center in the bowl area of the pumpkin. Bring the ribbon down to the bottom center and hot glue another end so that ribbon is secure against Foam Ball. (Trim ends if needed. Also, no glue should be needed on the middle areas of the ribbon lengths – just on the ends at the top and bottom centers.)
- Similarly, attach the next length, overlapping most of the first length at the top, but only about 1/2″ of that length at the side, then back to overlapping most of it again at the bottom center. Repeat each length, working your way around until you reach the beginning again. Before adding the last length, tuck it under the first length so that the overlapping pattern is consistent. (Note: You may need to gather or fold at the top and bottom to follow the Ball’s curve. Trim ends as needed as you go so that the overlapping ribbon doesn’t get too bulky for the stick to go into the top hole and for the pumpkin to sit flat on the bottom.)
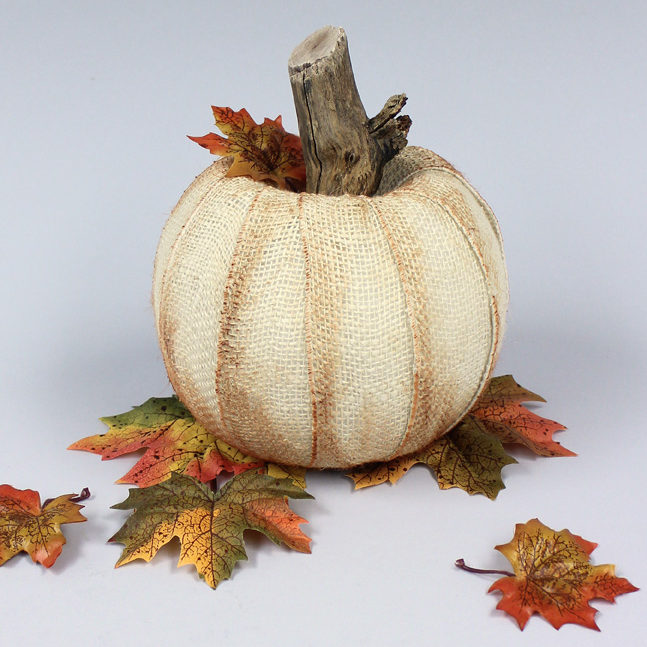
- To antique, dab a corner of paper towel onto a chalking ink pad and then rub along the edge of each length ribbon carefully to darken. (Note: Start applying very lightly so as not to get too dark since it can’t easily be lightened.) Refer to the photo to add chalking ink to a few random places on the pumpkin, on ribbon areas other than just along the edges.
- For the stem, trim, stick to the desired length, and insert into the hole in the foam. (Note: glue cut end and leave top end as natural as possible.) Hot glue to hold. Hot glue the stem of one leaf against the base of the pumpkin stem. Scatter other leaves around the bottom of the pumpkin.
-
 Celebratory Candy CakeSkill level: Beginner
 -
 Teacher Gift MugSkill level: Beginner
 -
 Bubbling Pumpkin CauldronSkill level: Beginner
 -
 Custom Charcuterie DisplaySkill level: Beginner
 -
 St. Patrick’s Day DecorSkill level: Beginner
 -
 Butterfly Pixel Wall ArtSkill level: Beginner
 -
 Fruit Appetizer TreesSkill level: Beginner
 -
 Easter Egg Table DécorSkill level: Beginner
 -
 Shamrock Porch DécorSkill level: Beginner
 -
 Eyeballs Everywhere WreathSkill level: Beginner
 -
 Narwhal Wall ArtSkill level: Beginner
 -
 Painted Cactus Wall ArtSkill level: Beginner
 Subscribe


