
Supplies
- FloraCraft® CraftFōM®:
- 3" Cone - White
- 3”x4” Organza Treat Bags - Black and White
- Beading Wire - Black
- Acrylic Gems - Orange
- Feather Boa - Black
- Cardstock - Black
- White Marker or Chalk
- Small Straight Pins
Tools
- Low-Temp Glue Gun
- Scissors
- Wire Cutters
Instructions
(See below for how-to photos)
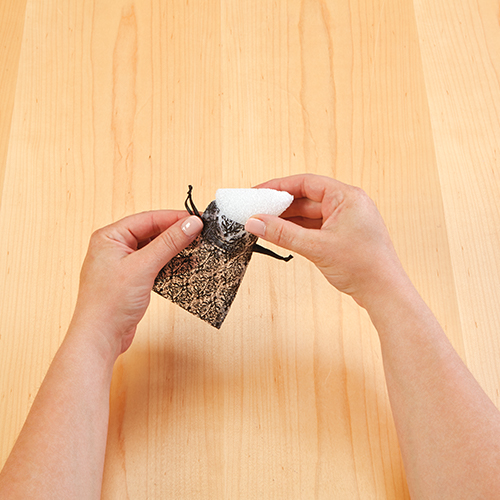
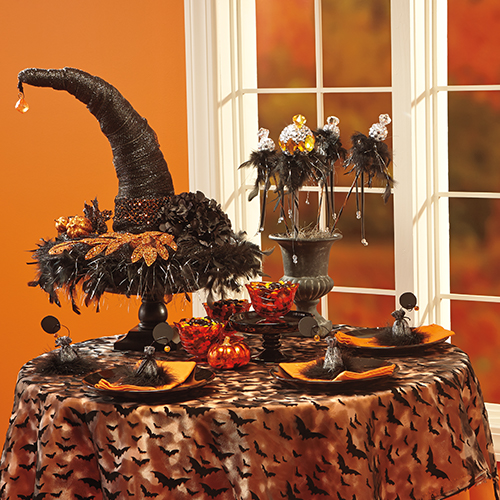
- Place the cone into the bag as shown. If you have trouble fitting the cone into the bag’s opening, roll the bottom edge of the cone on the table to slightly round the edge. You want the bottom of the cone to fit snugly into the bottom of the bag. The corners of the bag will stick out on each side; secure the corners to the bottom of the cone with glue. The cone will be slightly taller than the bag. Break the tip of the cone off where the bag ties closed and pinch and shape the top of the cone back into a point with your fingers.
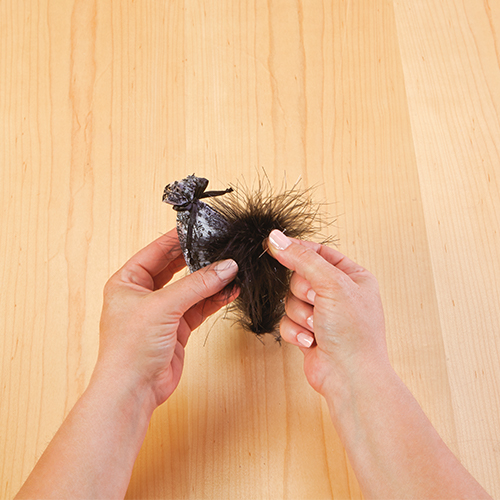
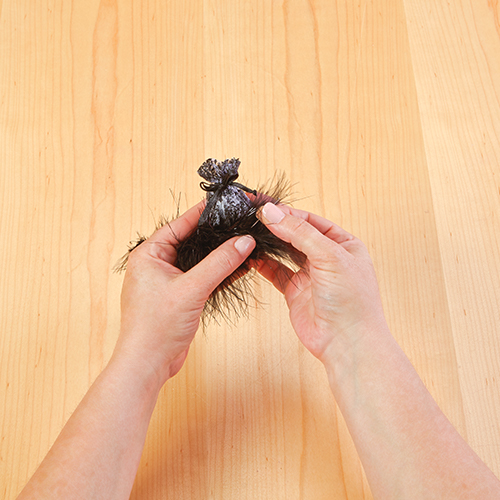
- Tie the bag closed tightly over the top of the cone.
- Pin a boa length around the bottom of each cone for the hat’s brim.
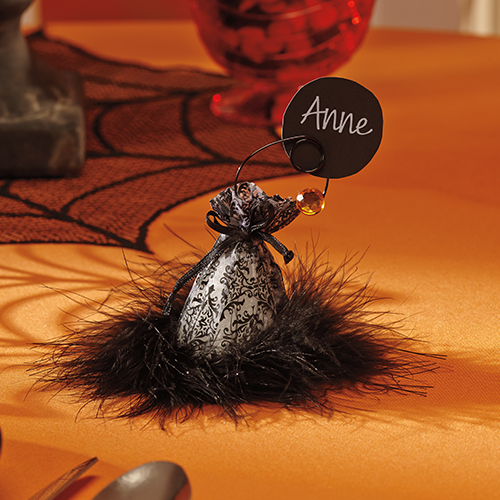
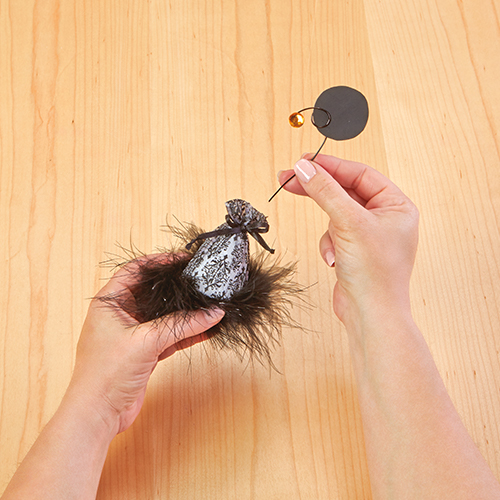
- Cut a 5″ piece of wire and bend a tight coil into the wire to hold the place card. Glue gems to the end of the wire, then glue the end into the top of the cone through the bag.
- Cut 2″ circles from the black cardstock. Write the guest’s name in a white marker or chalk on the circle, then insert it into the coiled wire.
-
 Celebratory Candy CakeSkill level: Beginner
 -
 Teacher Gift MugSkill level: Beginner
 -
 Bubbling Pumpkin CauldronSkill level: Beginner
 -
 Custom Charcuterie DisplaySkill level: Beginner
 -
 St. Patrick’s Day DecorSkill level: Beginner
 -
 Butterfly Pixel Wall ArtSkill level: Beginner
 -
 Fruit Appetizer TreesSkill level: Beginner
 -
 Easter Egg Table DécorSkill level: Beginner
 -
 Shamrock Porch DécorSkill level: Beginner
 -
 Eyeballs Everywhere WreathSkill level: Beginner
 -
 Narwhal Wall ArtSkill level: Beginner
 -
 Painted Cactus Wall ArtSkill level: Beginner
 Subscribe


