
Supplies
- FloraCraft® CraftFōM®:
- 1” x 12” x 36” Sheet - White
- (3) 3” Balls - White
- (3) 4" Clay Pots
- Acrylic Paint - Black
- Cheesecloth
- 12" Natural Branches
- Chenille Stems:
- Black
- Purple
- Twine
- Acrylic Jewels:
- Silver
- Purple
- Red
- Feathers:
- Black
- Purple
Tools
- Foam Cutter or Serrated Knife
- Low-Temp Glue Gun
- Scissors
- Wire Cutters
- Pencil
Instructions
- Paint each clay pot black and set aside to dry.
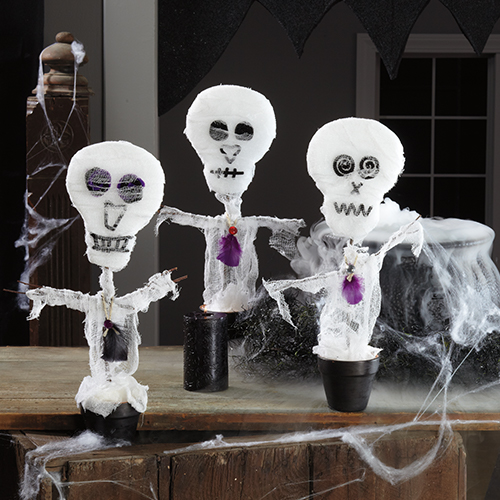
- Use the pencil to free hand three skull shapes onto the foam sheet. It’s basically the shape of an oversized light bulb. Make each skull about 8” – 10” tall by about 6” wide at the widest point. They do not have to be identical or exact. Use the Foam Cutter or the serrated knife to cut the shapes from the sheet. Use the scrap pieces of foam as sanding blocks to smooth out and round the edges of the skulls.
- Use chenille stems for the faces. Bend and shape the stems to create unique facial features and glue in place.
- Glue a 3” ball into the bottom of each clay pot. Insert a 12” length of branch into the bottom of each skull and secure with glue. Glue the skulls into the 3” balls in the pots. Cut two 6” branch arms for each skeleton. Glue the arms in place with low-temp glue about 2” down from the skull. Tie with twine to secure the arms to the center branch.
- Cut strips of cheesecloth about 2” wide and loosely wrap the skull, neck and arms. Drape wider strips for the front and back of the body as shown. Cover the top of the pot with a loose pile of cheesecloth to completely cover the foam.
- Tie a loop of twine around the neck of each skeleton then glue a small feather and jewel to each twine loop.
-
 Celebratory Candy CakeSkill level: Beginner
 -
 Teacher Gift MugSkill level: Beginner
 -
 Bubbling Pumpkin CauldronSkill level: Beginner
 -
 Custom Charcuterie DisplaySkill level: Beginner
 -
 St. Patrick’s Day DecorSkill level: Beginner
 -
 Butterfly Pixel Wall ArtSkill level: Beginner
 -
 Fruit Appetizer TreesSkill level: Beginner
 -
 Easter Egg Table DécorSkill level: Beginner
 -
 Shamrock Porch DécorSkill level: Beginner
 -
 Eyeballs Everywhere WreathSkill level: Beginner
 -
 Narwhal Wall ArtSkill level: Beginner
 -
 Painted Cactus Wall ArtSkill level: Beginner
 Subscribe


