
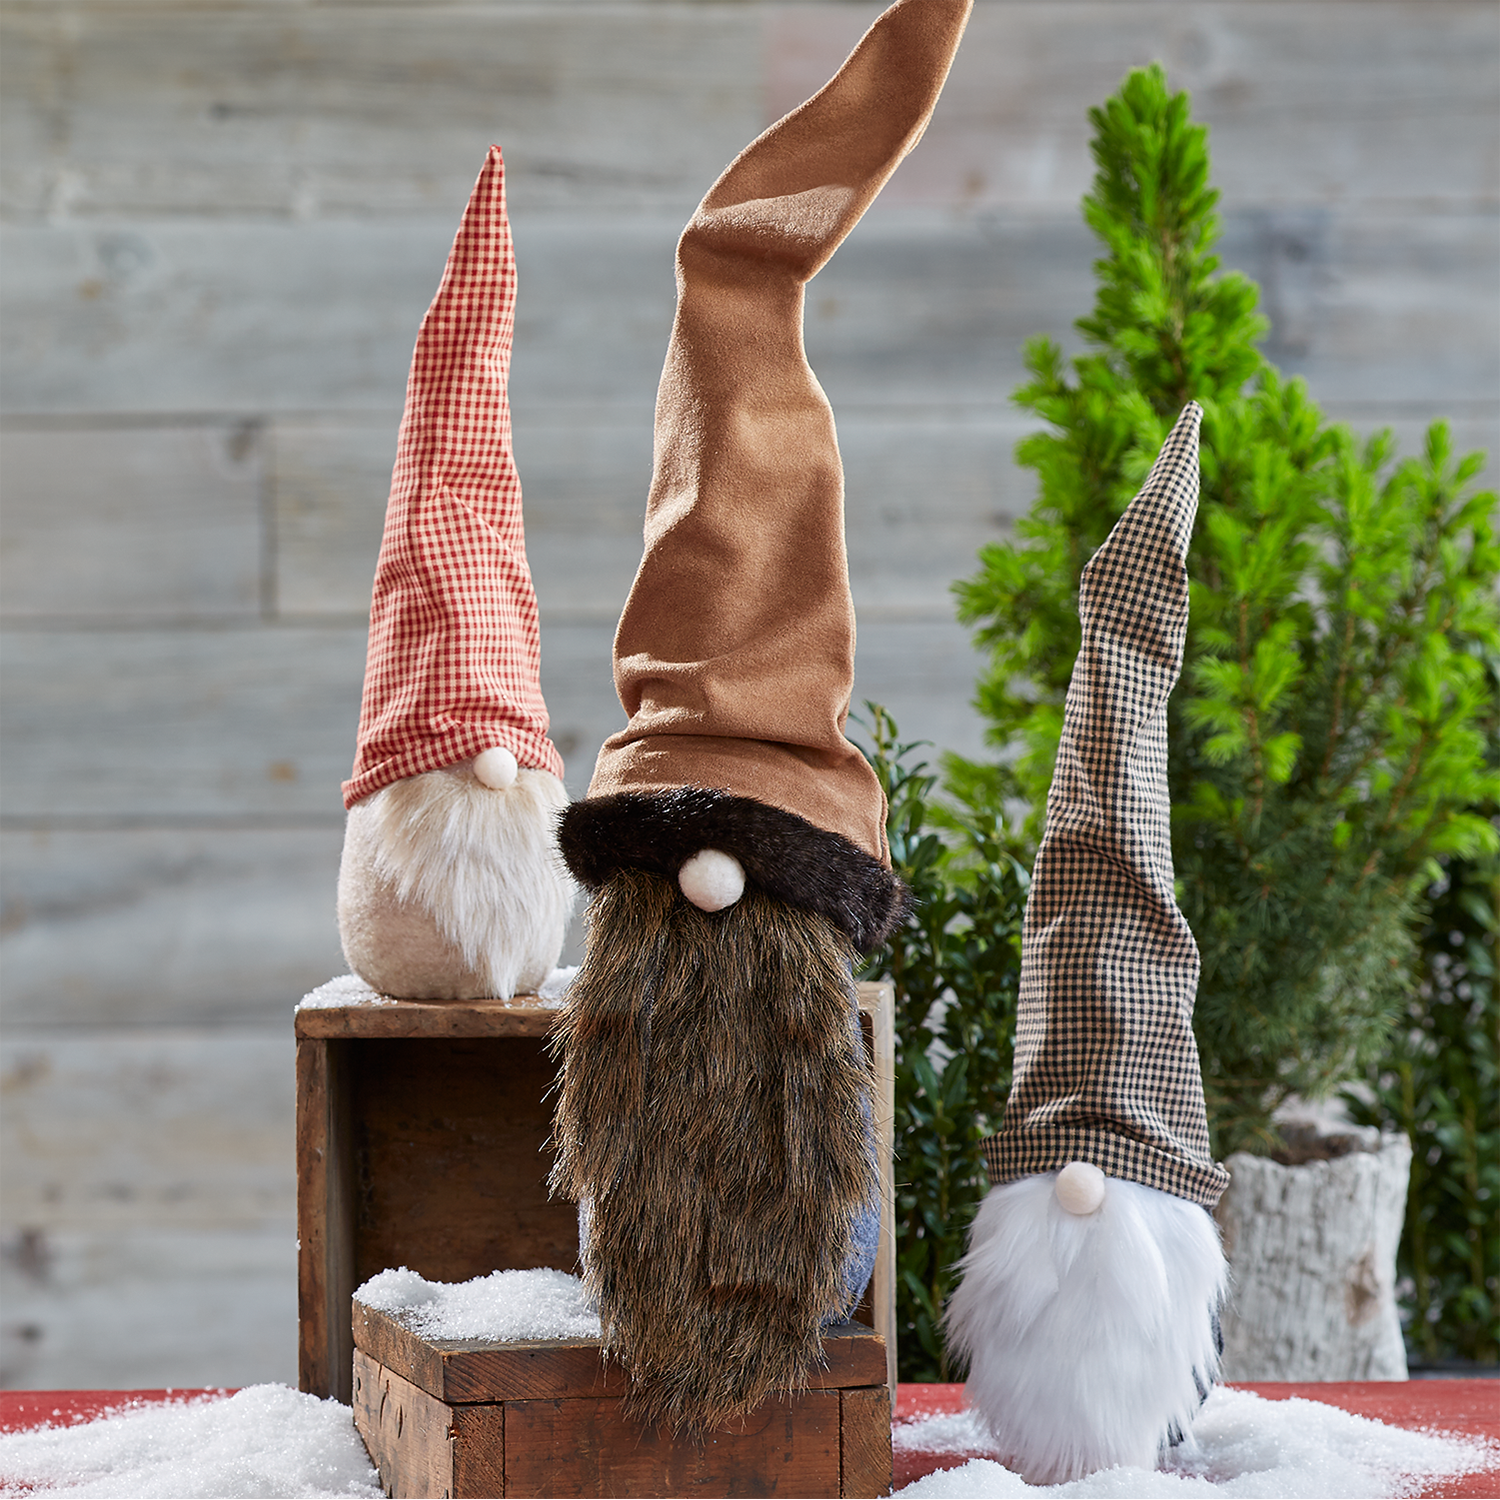
Supplies
- FloraCraft® CraftFōM®:
- 9”, 12” and 15” Cones - White
- (3) 1” Balls - White
- Small Check Fabric: Black/Tan and Red/Tan
- Faux Suede: Caramel Color
- Faux Fur: (4) Coordinating Colors
- Felt: Charcoal, Grey, Light Tan and Cream
- Heavy Gauge Wire
Tools
- Low-Temp Glue Gun
- Scissors
- Sharp Craft Knife
- Black Marker
- Holiday Gnome Hats Template:
Instructions
- Firmly roll the bottom edge of the cones on the table to taper them at the bottom.
- Cut a 14”x 6.5” piece of charcoal felt. Wrap and stretch the felt around the bottom section of the 15” cone. Trim the felt along the seam at the back and glue neatly in place. Trim the felt along the bottom edge of the cone and glue in place. Cut an 11”x 4.5” piece of grey felt to cover the bottom section of the 12” cone. Cut an 11”x 3.5” piece of tan felt to cover the bottom of the 9” cone.
- You will need an 8” long x 4” wide piece of fur for the large beard. A 5.5” long x 4” piece of fur for the medium beard and a 3” long x 3.5” wide piece for the small beard. To cut the fur, draw the beard shape on the back of the fur. Use the craft knife razor blade to carefully cut just through the backing of the fur. This will allow the fur to wisp over and hide the cut edge. Be sure the fur is laying in the right direction before you cut. Glue the beards to the fronts of the cones along the top edge of the felt.
- Use your fingers to compress two of the 1” balls down to about half the size. Cut a 3” circle and two 2” circles of cream felt. Wrap each of the three balls with felt to completely cover. Gather all the felt at one side of the ball and trim away excess felt. Glue the edges of the felt in place at the back of the ball. Insert toothpicks into the backs of the balls and glue the noses in place centered above the beards.
- Draw and cut out the mustaches. You will need two 5” long x 1” wide pieces for the large gnome. Glue these two pieces on each side of the nose. Cut two 2” long x ½” wide pieces for the medium gnome and glue to either side of the nose. Cut one ¾” long x 2” wide piece for the small gnome. Glue this piece centered under the nose.
- Cut the small and medium hat templates from the small check fabrics. Glue the fabric together along the seam to create the cone shaped hats. Cut the large hat template from the suede fabric. Glue a length of 1” fur trim along the bottom inside edge of the large hat. Glue the suede together along the seam to create the large fur trimmed hat.
- Cut a 4” piece of wire and glue it into the top of the 9” gnome. Cut a 5” piece and glue it into the top of the 12” gnome. Glue a 7” piece of wire into the top of the 15” gnome. Roll up the bottoms of the small and medium hats and place them on the gnomes. Pull the hats down over the noses slightly. Place the large hat on the large gnome with the fur trim pulled slightly over the nose. Bend the wires in the tops of the hats to position the hats as desired.
-
 Celebratory Candy CakeSkill level: Beginner
 -
 Teacher Gift MugSkill level: Beginner
 -
 Bubbling Pumpkin CauldronSkill level: Beginner
 -
 Custom Charcuterie DisplaySkill level: Beginner
 -
 St. Patrick’s Day DecorSkill level: Beginner
 -
 Butterfly Pixel Wall ArtSkill level: Beginner
 -
 Fruit Appetizer TreesSkill level: Beginner
 -
 Easter Egg Table DécorSkill level: Beginner
 -
 Shamrock Porch DécorSkill level: Beginner
 -
 Eyeballs Everywhere WreathSkill level: Beginner
 -
 Narwhal Wall ArtSkill level: Beginner
 -
 Painted Cactus Wall ArtSkill level: Beginner
 Subscribe


