
Supplies
- FloraCraft® CraftFōM®:
- 1" x 11.9" x 17.9" Sheet - White
- Acrylic paint:
- Gray
- Black
- Green
- White
- Chalkboard Black
- 6" Square Cardstock:
- Dark Gray
- Yellow
- 1/2" Ribbon - Black Halloween Themed
- (6-10) Miniature Halloween Characters
Tools
- Foam Cutter or Serrated Knife
- Paintbrushes: 2" Wide and 1/4" Wide Chisel
- White Chalk
- Permanent Fine Marker
- Low Temp Glue Gun and Glue Sticks
- Scissors
- Pencil
- Ruler
- Paper Plate
- Toothpicks
- Water Container
- Paper Towels
Instructions
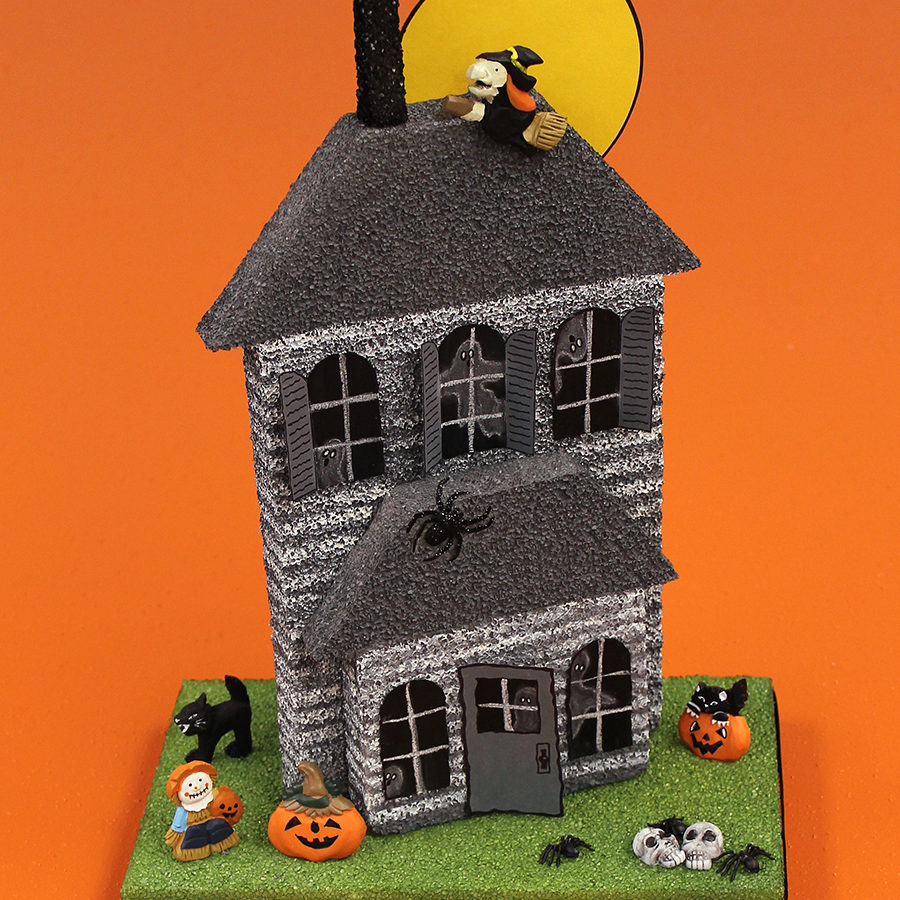
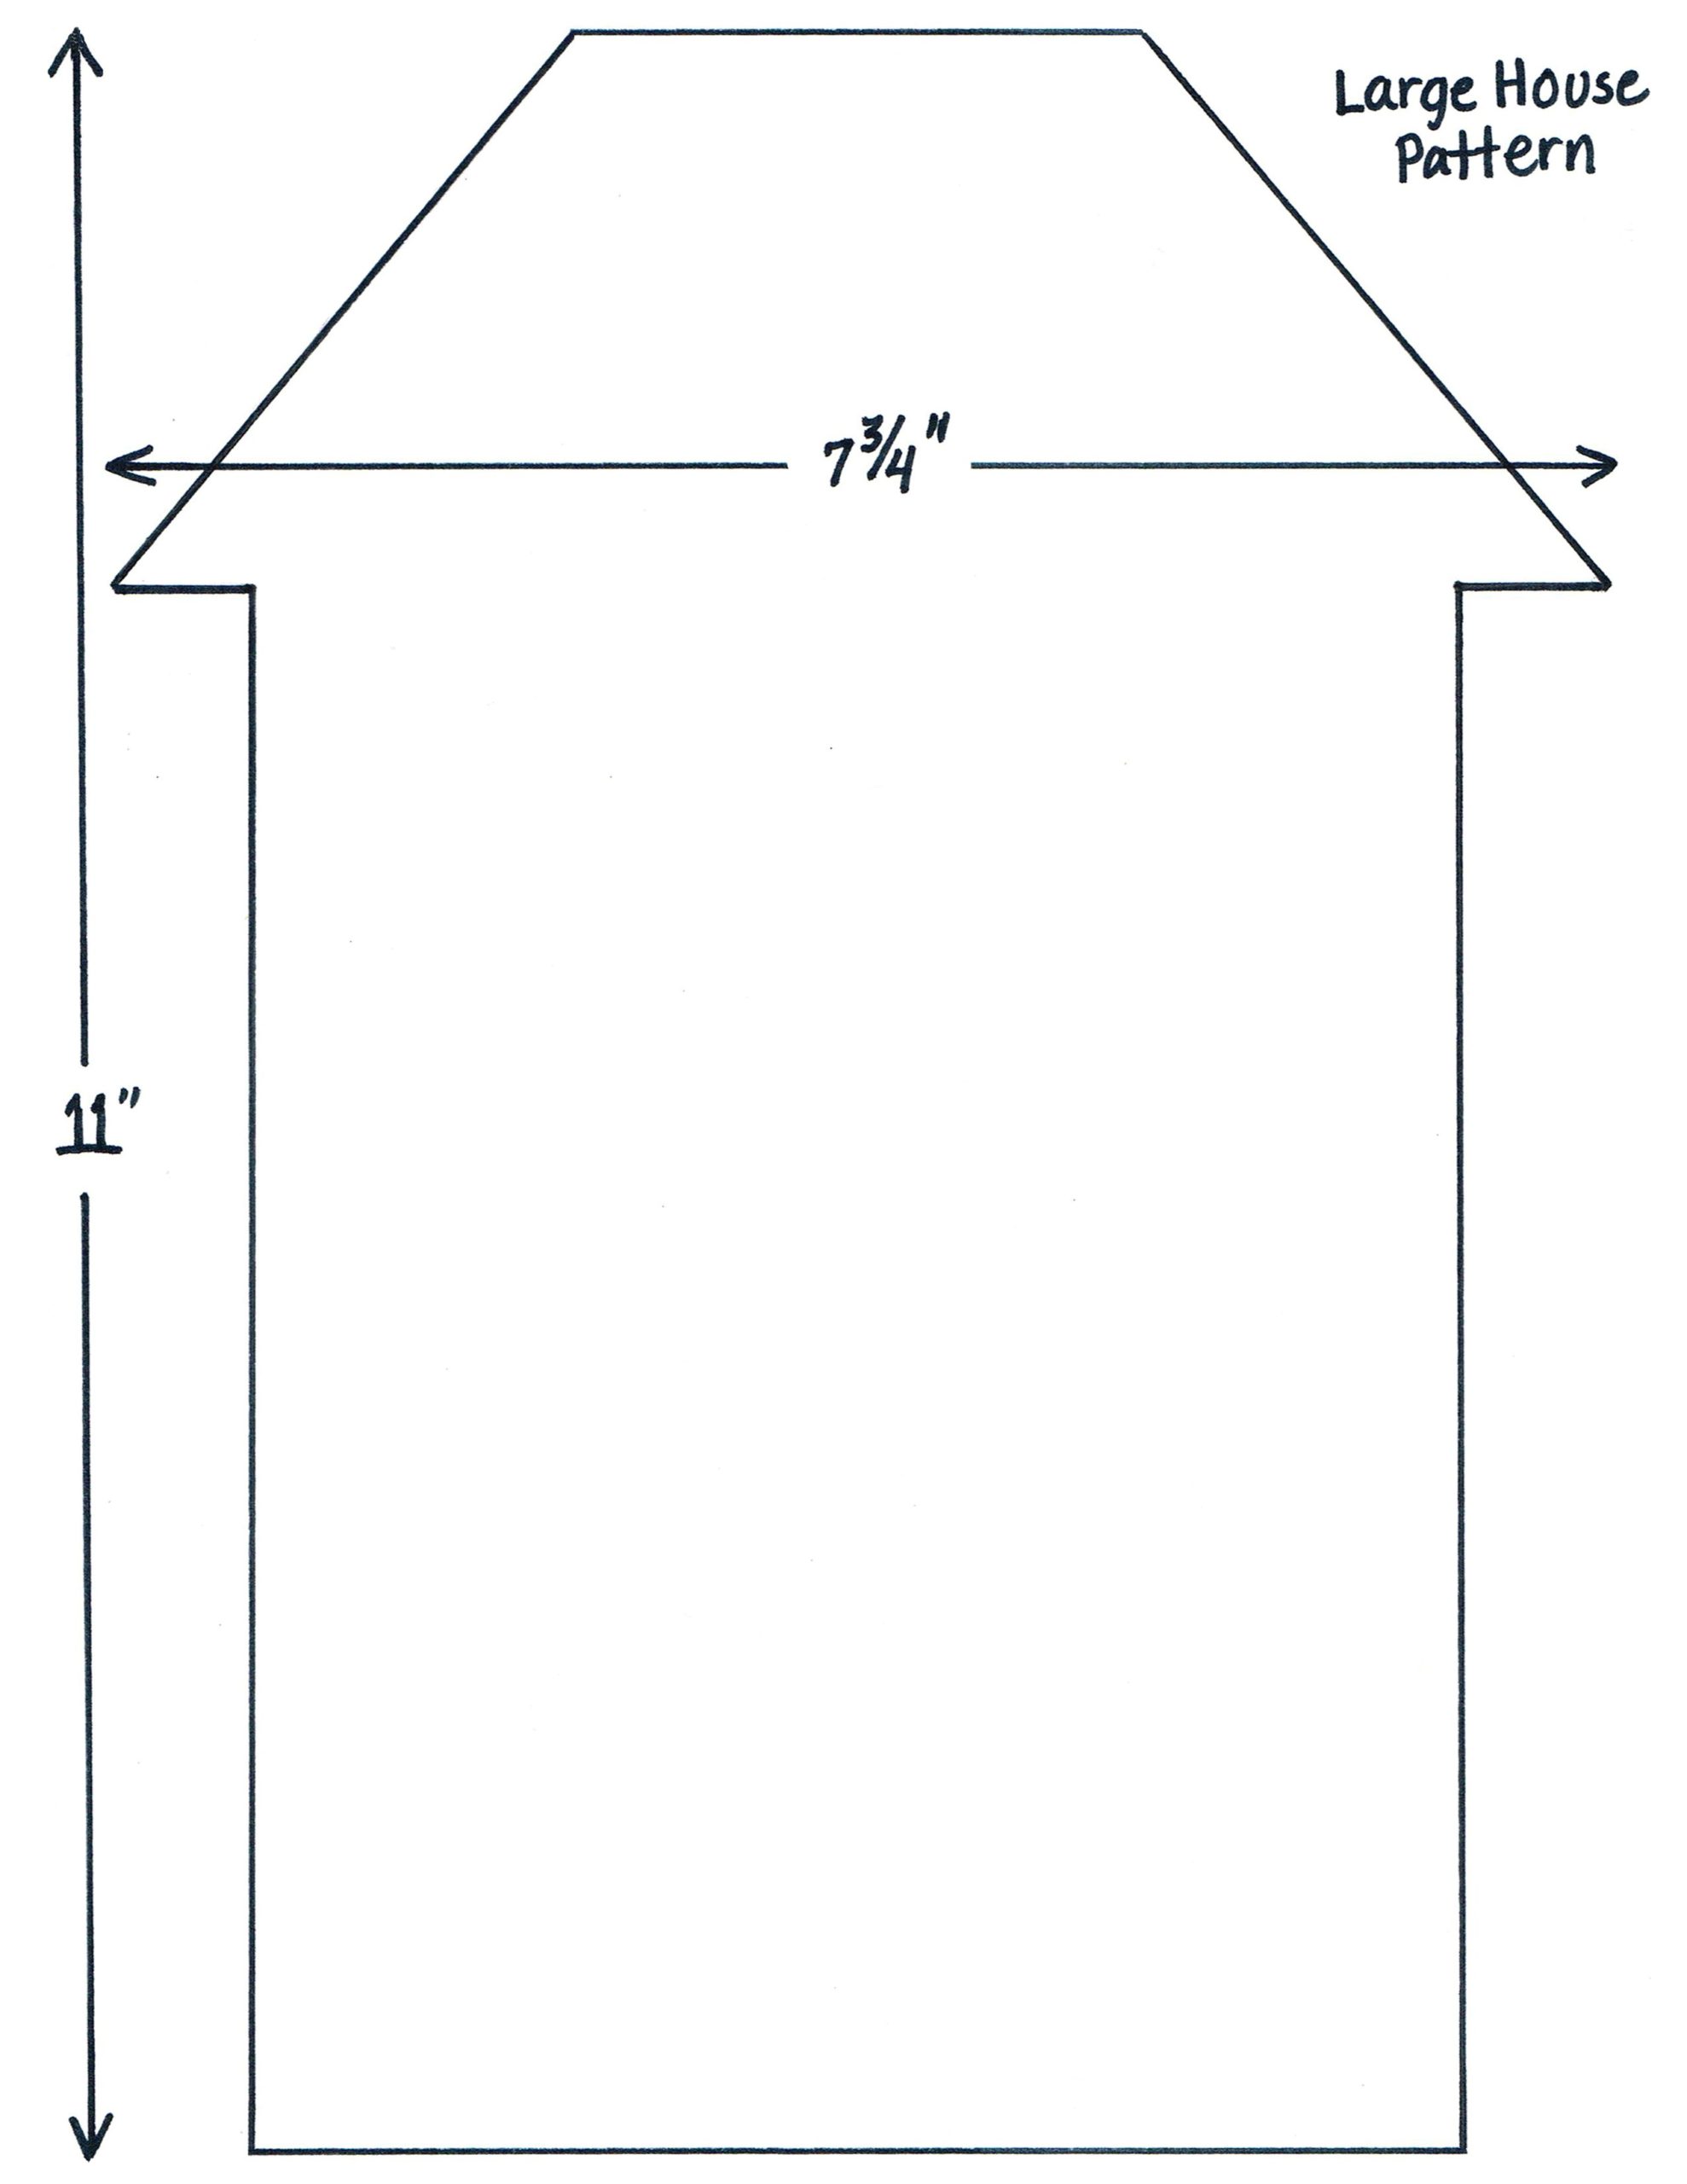
- This is a great project for kids, with a little help from an adult. Use a permanent marker and ruler to draw foam on a 6″ x 10″ base. Cut out Large House and Small Addition patterns and trace them onto the foam. Use Foam Cutter to cut out pieces. From scraps, cut 1/2″ x 2″ and 1/2″ x 1 1/4″ pieces for Chimney.
- Use a large paintbrush to paint both Large House and Small Addition with Zinc, including edges and backs. Paint Base Avocado and Chimney pieces Black. Let dry.
- To paint siding lines on the House, squeeze a quarter-size puddle of White onto a plate. Add enough water and mix with a small brush to create cream consistency. Practice on the back of the Large House, first. Place ruler horizontally across House, just under roofline. Paint 1/4″ wide stripe of white paint across Foam. Move ruler down 1/2″. Paint another stripe. When comfortable with the process, turn over Large House similarly paint horizontal stripes, moving ruler down into dry area each time and paint stripes all the way down. (Keep checking to make sure lines are horizontal.) Let dry. Repeat with Small Addition.
- Use a pencil to trace the window pattern onto dark gray cardstock, making one with the shutter on the right, one with the shutter on the left, one with both shutters, and two without shutters. Also, draw a 1 1/2″ x 2 3/4″ rectangle for the door. Use scissors to cut out.
- Using a pencil and ruler, draw a line to separate the window from the shutter on each that has shutters. Use a small paintbrush to paint the window area only (not shutters) using Chalkboard Paint. Use a pencil to draw a square window in the door and paint, also. Let dry.
- Use a marker to outline and draw horizontal lines on shutters, letting them be wiggly for a spooky look. Draw handle plate and handle on the door. Fold shutters over and re-open. Use chalk to lightly draw window lines, making one vertical line and two evenly-spaced horizontal lines in each window.Then draw ghost outlines, one in each window. (Make them in all different parts of the windows, some upside down.) Use a small, dry paintbrush to lightly spread chalk inside the ghost body. Re-outline and make white eyes. Trace marker around eyes and make small, solid oval mouths. Then press harder to make whiter and slightly wider window chalk lines.
- With Large House flat on a table, glue gun to attach Small Addition, with bottoms aligned. Leaving House down, arrange windows according to the photo by holding onto shutters or un-chalked areas of windows. Glue windows (not shutters). Slightly bend the door where hinges would be and glue that area only to Addition.
- Insert 3-5 toothpicks (going in about halfway) into the bottom of Large House and Small Addition. Position in the center, at an angle on a green Base, and press into place. Remove, apply glue gun glue and press back down into the same toothpick holes.
- For Chimney, trim off part of the thickness of two thin Foam pieces and glue them together to form a “T” (with a shorter length going across a longer length). Insert a toothpick halfway into the bottom and glue it onto the top left of the tallest roof. For Moon, trace around an approx. 4″ mug or cup and go over with marker. Cut out and glue to the back of the roof so that moon shows from the top right front.
- Glue the end of the ribbon at the center back and wrap around the base, applying glue at each corner to hold. Determine placement of characters. Press them into the foam to create small indentions. Then glue into place. (Spiders can just be glued to surfaces.)
-
 Celebratory Candy CakeSkill level: Beginner
 -
 Teacher Gift MugSkill level: Beginner
 -
 Bubbling Pumpkin CauldronSkill level: Beginner
 -
 Custom Charcuterie DisplaySkill level: Beginner
 -
 St. Patrick’s Day DecorSkill level: Beginner
 -
 Butterfly Pixel Wall ArtSkill level: Beginner
 -
 Fruit Appetizer TreesSkill level: Beginner
 -
 Easter Egg Table DécorSkill level: Beginner
 -
 Shamrock Porch DécorSkill level: Beginner
 -
 Eyeballs Everywhere WreathSkill level: Beginner
 -
 Narwhal Wall ArtSkill level: Beginner
 -
 Painted Cactus Wall ArtSkill level: Beginner
 Subscribe


