
Supplies
- FloraCraft® CraftFōM®:
- (3) 14" Wreaths - White
- Pearl Head Pins
- 1 ¼ yds Felt - Red
- Yarn:
- White
- 1.5” Ribbon
Tools
- Low-Temp Glue Gun
- Scissors
- Ruler
Instructions
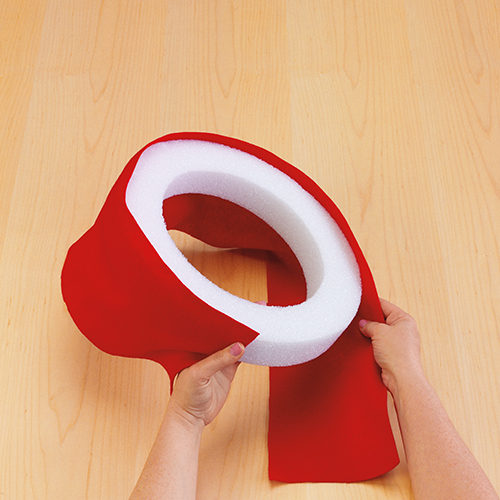
- Cut a 7.5″ x 44″ piece of felt. Wrap the felt snug around the outside edge of the wreath so that about a ½” of the edge wraps around to the back of the wreath.
- Cut the ends of the felt where they meet on the wreath, so they are flush to help conceal the seam. Glue in place. Glue the ½” edge of felt to the back of the wreath all the way around to hold the felt in place.
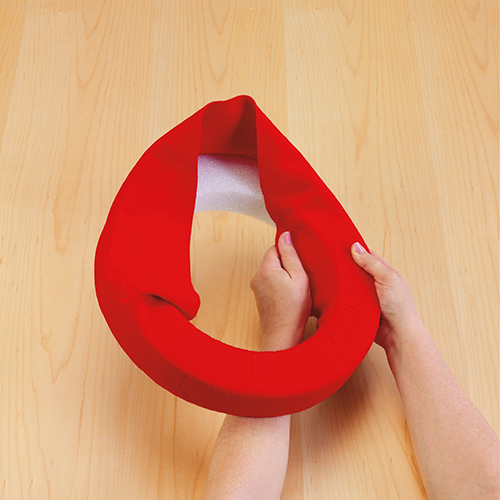
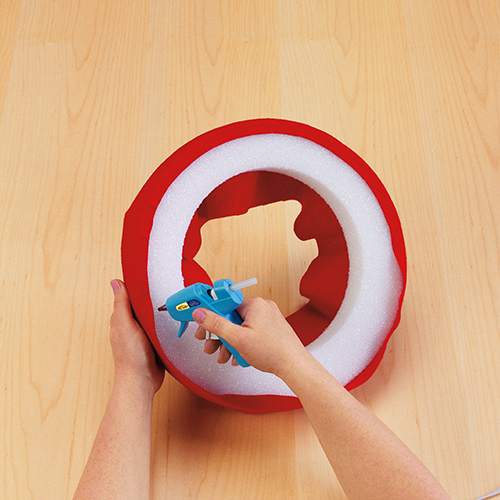
- Begin wrapping the felt around the front of the wreath and through the center to the back, as shown. Stretch the felt and smooth out the wrinkles as you go. Glue the felt edge again at the back of the wreath all the way around to secure it in place.
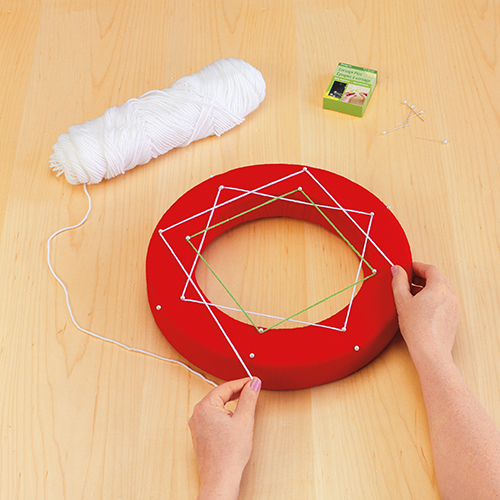
- Position the pearl head pins onto the wreaths in your desired patterns. Pin the wreaths’ inside and outside edges for unique effects with the strung yarn.
- Glue the end of the yarn under the first pin. String the yarn in your desired pattern and glue the end under the last pin. Continue to add the second color of yarn and complete your design.
- Cut a length of ribbon for the hanger—pin ribbon to the back of the wreaths and glue in place to secure.
-
 Celebratory Candy CakeSkill level: Beginner
 -
 Teacher Gift MugSkill level: Beginner
 -
 Bubbling Pumpkin CauldronSkill level: Beginner
 -
 Custom Charcuterie DisplaySkill level: Beginner
 -
 St. Patrick’s Day DecorSkill level: Beginner
 -
 Butterfly Pixel Wall ArtSkill level: Beginner
 -
 Fruit Appetizer TreesSkill level: Beginner
 -
 Easter Egg Table DécorSkill level: Beginner
 -
 Shamrock Porch DécorSkill level: Beginner
 -
 Eyeballs Everywhere WreathSkill level: Beginner
 -
 Narwhal Wall ArtSkill level: Beginner
 -
 Painted Cactus Wall ArtSkill level: Beginner
 Subscribe


