
Supplies
- FloraCraft® CraftFōM®:
- Balls:
- 5" - White
- 8” - White
- Feather Boa - Black
- (20) Chenille Stems - Black
- Acrylic Paint - Black
- (8) Animal Eyes - Black
Tools
- Foam Cutter or Serrated Knife
- Low-Temp Glue Gun
- Wire Cutters
- Scissors
- Paint Brush
- Pencil
Instructions
- Use the Foam Cutter or serrated knife to cut the 8” and the 5” balls in half. Use the other half of each ball to create a second spider or reserve for a future project. Shape the head and body of the spider into ovals. Hold the ball on its cut edge on the table, press firmly and roll back and forth slightly to flatten the edge. Stand the ball on its opposite edge and repeat. Continue shaping until your spider has the look you desire.
- Glue the head to the body. Paint the spider black and set aside to dry.
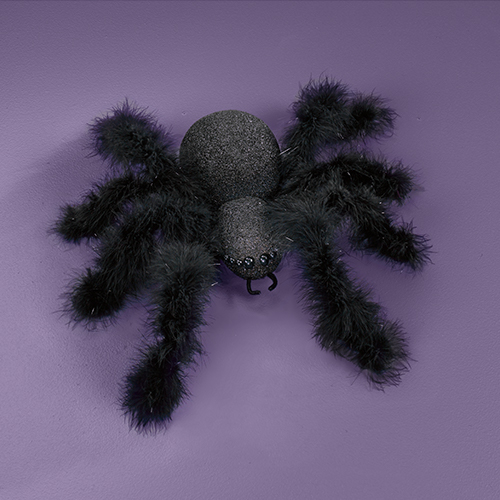
- Twist two chenille stems together for each of the eight legs. Cut 14” lengths of feather boa for each leg. Cut 24 pieces of 1.5” stem to use as ties. Secure one end of the boa to the leg about 1” up from one end. About half way down the leg secure the boa again; this is where the leg bends. The boa will be slightly longer than the end of the stem. Loop the boa and secure the loop to the end of the stem. This creates a fuzzy foot. Repeat this step for each leg. Secure the stem from each leg into the body just behind the neck (4 on each side).
- Cut two 3” pieces of chenille stem. Fold each piece in half and twist the ends together. Shape a slight bend in each and glue into the front of the face for the pinchers. Glue four eyes on each side of the head just above the pinchers, as shown.
Let him creep up your wall!
-
 Celebratory Candy CakeSkill level: Beginner
 -
 Teacher Gift MugSkill level: Beginner
 -
 Bubbling Pumpkin CauldronSkill level: Beginner
 -
 Custom Charcuterie DisplaySkill level: Beginner
 -
 St. Patrick’s Day DecorSkill level: Beginner
 -
 Butterfly Pixel Wall ArtSkill level: Beginner
 -
 Fruit Appetizer TreesSkill level: Beginner
 -
 Easter Egg Table DécorSkill level: Beginner
 -
 Shamrock Porch DécorSkill level: Beginner
 -
 Eyeballs Everywhere WreathSkill level: Beginner
 -
 Narwhal Wall ArtSkill level: Beginner
 -
 Painted Cactus Wall ArtSkill level: Beginner
 Subscribe


